Showing posts with label Snowman. Show all posts

Monday, December 17, 2018

Doodlebug Design | Christmas Town Cut File Ornament

Hi Everyone!  Christmas is in full swing at our house, we are finally decorated and now the wrapping begins!  I love decorating our tree, looking back at the ornaments and remembering their stories.  I decided to create a new ornament this year, using one of the adorable Doodlebug Design Christmas Town Cut files... take a peek...


I used the Christmas Town Snowman Look Up file (SVG, Silhouette) to create a pattern for my ornament. First I sized the Snowman in Silhouette, then cut him from thin paper.  I used the paper pieces as a pattern and cut the Snowman from some fun Papertrey Ink Felt.  Then I just stitched him together!


I used some Doodlebug Sequins in Bubblegum and some seed beads for the cheeks.  The eyes and mouth are pieces of Beetle Black Doodlebug Sequins that I cut with a hole punch.


I wanted the arms to be a little more stable so I cut two of each arm and stitched them together, then stitched them onto the snowman body.


I added a swimming pool Doodlebug Sequin to the cute little bowtie and some tiny black buttons from my stash.


Finally I stitched the year on a scrap piece of felt and stitched it to the back of the ornament so we know what year it was made.  He look so cute on the tree!


That's it for me today, thanks for stopping by to peek!


Thursday, January 4, 2018

Lori Whitlock: Snowman Gift Box Tutorial

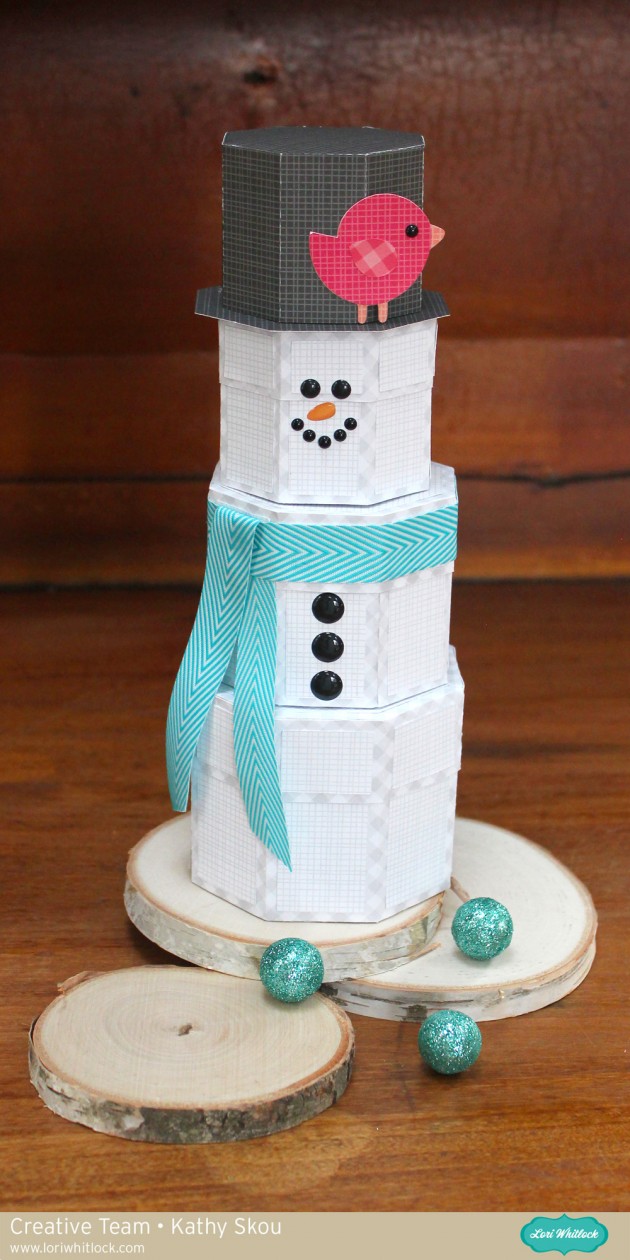
Hi Everyone, and Happy New Year!  I don't know about where you are but we are covered with snow here in the Boston Area!  I'm not a fan of the cold, but I do love snowmen!  I decided to make my own little snowman gift box using Lori Whitlock's new Polygon Box - 8 Sides. (here in the Silhouette store) and some Gingham Linen Petite Prints from Doodlebug Design.


This little collection of boxes is the perfect way to package up a treat or small gifts!   It was really easy to put together.  I started by loading the box into Silhouette.  I then copied the box two more times to make up the 3 segments of the snowman's body.  I resized each box so that they were graduated in size.  The sizes I made them can be seen below.


I cut the boxes, and glued the decorative panels to each piece before I set to assembling them.


These boxes are very easy to assemble.  To start, I folded the score lines on the tabs and then along the side panel.  Then you simply glue each section of the side to it's corresponding tab to form the base.


To finish, just glue the remaining side section to both the tab on the side and the tab on the bottom piece.


The top and the bottom of the box are assembled in the same manner.  Once I had all three boxes assembled, I decided to make a hat for the snowman.  I sized the bottom half of the box as shown below and then made a "brim" for the hat by re-sizing one of the decorative cover panels.


The rest is as easy as building a snowman!  I stacked the boxes and added a face & buttons using enamel dots.  The scarf is a piece of ribbon glued to the sides of the cover on the middle box.  I used a removable glue dot to hold the pieces together.  And of course I had to add the cute little Doodlebug birdie, (SVG here in Lori's Shop) which is this week's free file in the Lori Whitlock SVG Shop!


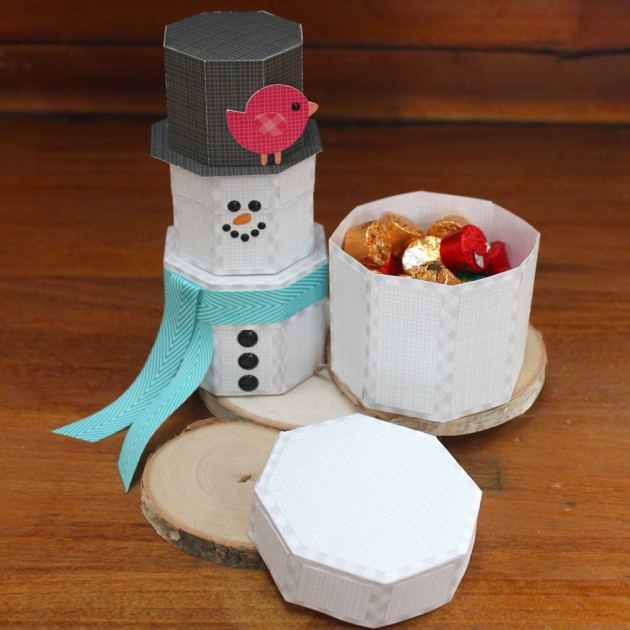
And each box opens to reveal a treat inside!


That's it for me today,  thanks for stopping by to peek!


Friday, November 4, 2016

Doodlebug Design: Here Comes Santa Claus Cut Files

Hi Everyone!  Today I have a project I created using the fabulous new Doodlebug Design Here Comes Santa Cut files available in both the Silhouette Online Store and the Lori Whitlock SVG Shop!  One of my all time favorite Doodlebug Characters is the little lopsided snowman!  You can imagine my excitement to find that he is now a cut file!  I decided to make him the focus of a fun Holiday decoration for my front door!  Take a peek...


Here are some more close-ups of my snowman... He is pieced together using Doodlebug Textured Cardstock,  Gingham-Linen Petite Prints, Here Comes Santa Claus Papers and some Chevron Sugar Coated Cardstock for the Snowflakes.  I also used some Ladybug Chunky Twine to Tie it all together (sorry, couldn't resist the pun)

I used the new Snowflakes #1 and Snowflakes #2 files as bases for my letters.


And last but not least I added the cute little bird which was part of last week's release!


And just so you can get a better idea of his size, here he is on my door.


That's it for me today, thanks for stopping by to peek!

Friday, December 4, 2015

Lori Whitlock: Do You Want to Build a Snowman?

 Hi Everyone!  I was up on the Lori Whitlock Blog yesterday with a tutorial on how to build this adorable Snowman Gift Box "tower."
 
 
I used a few of Lori's files including the 3D Scalloped Party Favor Box  (here in the Silhouette Store), the Square Gift Box with Bow  (here in Silhouette Store) and the Snowman Pocket Gift Card Holder (here in Silhouette Store)  to build and embellish my snowman.
 
 
The most fun part, you can fill each of the four boxes with gifts and goodies!  This would make a great gift for a friend, hostess or teacher!  Head over to Lori's blog here to see the full tutorial.  That's it for me today, thanks for stopping by!