I used Crate Paper's Portrait Collection and some of the latest MFT Die namics including By the Letter and Fringed Perennial.


 I just cut a piece of Echo Park Dots and Stripes Christmas to fit over the top of a lunch bag. I added a snowflake and some Twinery twine and DONE! The little birdie is new from Poppystamps.com and comes with a coordinating die... too cute!
 Next up was all the gift cards for teachers and nieces and nephews (too hard to get them what they want anymore!) I hate to give just a gift card, it needs to be pretty so I came up with these ornament holders. I used the Echo Park Holly Jolly Ornament SVG from iDiecuts.com as the base and just sewed a half circle on the back to hold the card. I finished it off with some Twinery Twine and the dog tag Die namic from MFT.
 The mittens are cut from a Sizzix Die and the twine is Stone from the Twinery.
 The snowflakes were cut using MFT's Snowflake Die namics and covered with Ice Stickles.
 We hope you can join us! To learn more about the Layout Workshop you can check out Right at Home's Blog and calendar.
 I cut the tag from my Cricut Cartridge Bags, Tags and Boxes. The snowman was created using the 1/4" Rosette from MFT. My favorite parts are the braided twine scarf and twine pom-pom! The snowflakes and sentiment are from MFT as well. Make sure to check the Right at Home blog to see all the fun tags and cards the ladies have created!

 I based this layout on a sketch by Frances Sylvia. The picture is of my daughter and friend apple picking at Dowses' Orchard in Sherborn, MA. I finally got to use my apple Whimsy pin!
 The leaf is made of Leaf Trim from May Arts. I colored it with Distress Ink. I cheated a little and used a Gluber as the base... much easier than sewing! The flower got the creative juices flowing and gave me the idea for my snow lady...
 (Supplies Used: Echo Park Holly Jolly Christmas: Stockings Hung, Up on a Housetop, Glad Things, Fa la la la la, Journaling Cards, Decorative Brads
I have been bitten by the multi media canvas craze and when I saw the cute little Echo Park Holly Jolly Christmas die cuts at iDiecut.com, I knew I had to use them in a project! If you've never created on canvas before... it's really easy and tons of fun! First, I covered the canvas with scraps of torn paper using Studio multi-medium. This give it some texture. Next I painted over the paper. I used a piece of note card to scrape the paint across the canvas. This allows for some of the paper to show through. I dipped my finger in the paint and covered the sides, then added some colors from the other canvases. I then added the die cut shapes in layers using the Multi medium again.
Once these steps are done, the fun begins! Using stencils and stamps, I added paint and ink all around the canvas. The last step was to doodle a bit around the shapes to make them pop a bit more.  As a final touch, I couldn't resist adding the Holly Jolly Decorative Brads to the tree!
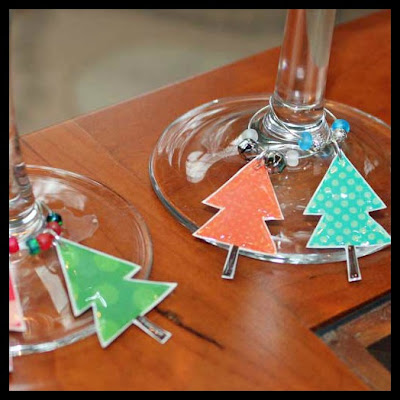
Wine Charms  (Supplies Used: Echo Park Holly Jolly Christmas: Snowy Tree Tops
Ranger Glossy Accents
Jewelry Findings: Wine Glass Rings, Jump Rings, assorted beads and tiny jingle bells)
I'm always looking for that easy & fun hostess gift idea during the holidays, and it doesn't get much easier than these adorable wine charms! You won't believe how simple they are to make!
 To start, I cut a few Christmas Trees from the Snow Tree Tops paper. I left a little white edge to make the colors stand out. Next, I poked a hole in the top. I then covered the entire tree with Glossy Accents. I added two coats to make the trees sturdier. It's like making your own epoxy stickers. Once dry, I added a jump ring through the hole. All that's left to do is to add the trees and some beads to the wine rings and voila!
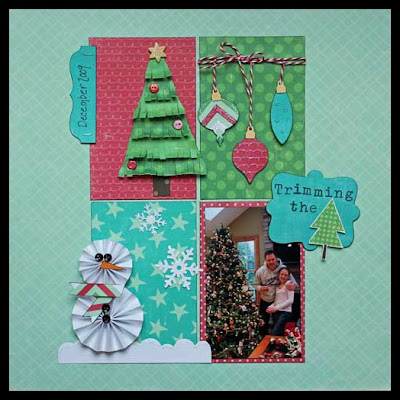
 (Supplies Used: Echo Park Holly Jolly Christmas: Snowy Treetops, Snowy Sidewalks, Glad Tidings, Yuletide Blue, Holiday Wrap, Stockings are Hung, Dash Away, Fa la la la la


 I LOVE the Jillibean Corrugated Alphas, and the Jute Flowers were just perfect!
 MFT Fan Club - We'll be working with some Memory Box papers and many of the new Die namics from the October Release including the Contempo Cage, the Oval Tab and the Oval Decorative Doily!
There are 2 dates set for the MFT Fan Club.. Saturday, October 29th at 12:30 and Thursday, November 3rd at 6:30.
If you're interested in joining us at either club meeting, please call Right at Home Scrapbooking at (508)695-9290 to reserve your spot!
 I used Doodlebug's new Monster Mania line... I just can't get enough of those little creatures!
 I was inspired by my recent multi media class to paint on my layout. I used bubble wrap to apply the color.
 I love the chipboard pieces that come with this line, I used the leafy flourish as a backdrop for the flowers I die cut using MFTs new Prima Donna Petals Die namic.
 The butterfly was "fussy cut" from the Garden Girl Paper.
 That's all for now... it was fun to look back many years (and a couple of dress sizes!) Check out the Bo Bunny Garden Girl Collection Kit at LCOM! You'll love the colors and patterns!