Showing posts with label Pop Up Cards. Show all posts

Monday, May 2, 2022

Doodlebug Design | Down on the Farm Pop Up Cards

Down on the Farm is one of my all-time favorite collections.  The little critters are absolutely adorable! The cows, pigs and sheep just make me smile!  I decided to make a few pop up cards using some of the stickers from the collection.  I love how there's always plenty of icons to make up little scenes!  Take a peek...

I love the punny sentiments in this collection.  They make it easy to create cards that are more "all purpose", springy cards.  The first card I created was with the little cow.  He is udder-ly adorable. And really... "Cow's it Going?"... just perfect.


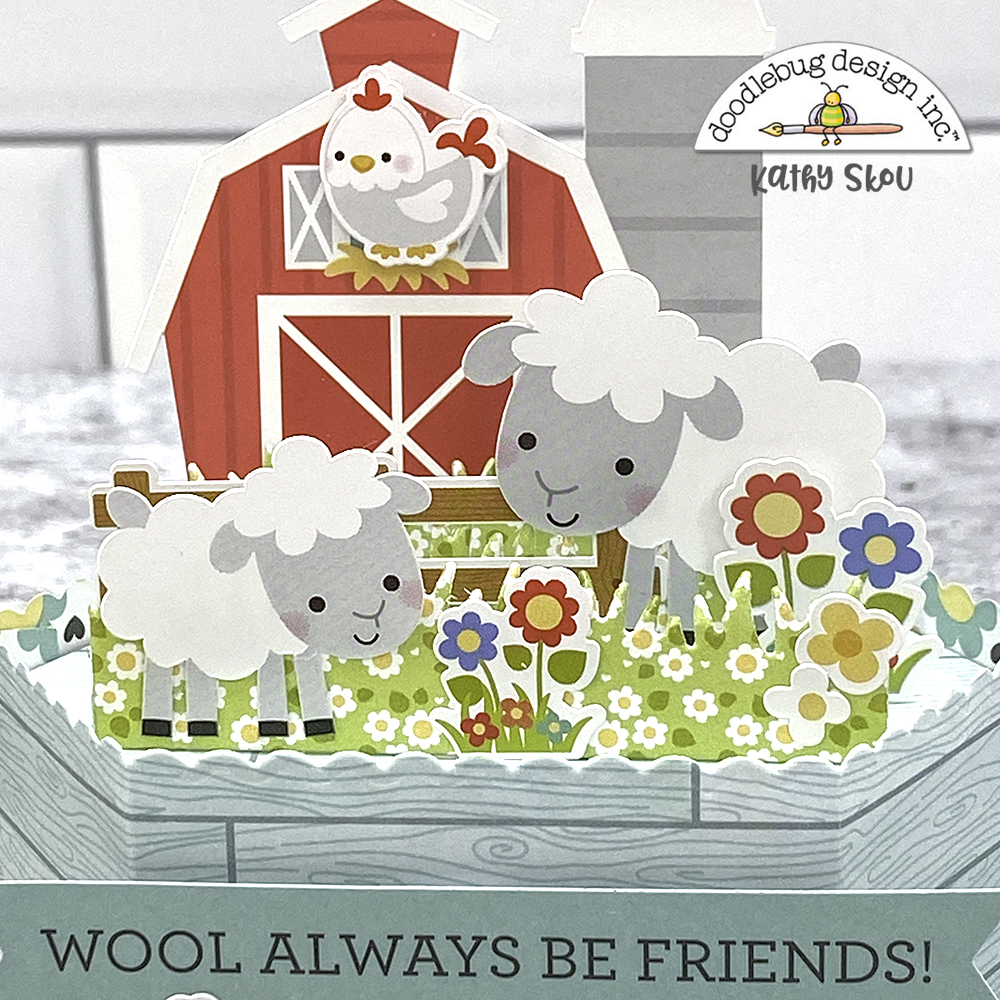
My next card features those fluffy sheep and the little chicken.   They're having a great day hanging in the meadow.


My last card features the chubby little piggies, hanging out in some mud puddles... They really are "Sow Sweet!"  My favorite part is the little worm popping up on the front of the card!


As I said, I love how all Doodlebug collections contain a variety of icons that allow you to build some fun little scenes!  Have you created any projects using the Down on the Farm Collection?  Make sure to tag Doodlebug Design on Facebook and Instagram, we love to see what you create!  That's it for me today, thanks for stopping by to peek!


Doodlebug Products Used

Down on the Farm Collection

Other Products

Lawn Fawn Pop Up Platform Dies
Sizzix Machine
Acetate
Adhesive


Thursday, February 7, 2019

Lori Whitlock | Silhouette Pop Up Creator Tutorial

Hi Everyone, I’m on the Lori Whitlock blog today with a fun tutorial showing how to use the Silhouette Pop Up Creator which is available in Silhouette Design Studio starting with version 4.1.  This is such a fun way to use all the shapes in your Silhouette Library!  I made this sweet kitty Valentine card using the cat from Lori Whitlock's Bobble Head Card Cat (SVG, Silhouette) and the Pop Up Creator.


To start, you want to select your shape.  Then trace your shape using the trace tool in Silhouette.  You also want to create two card base pieces, my first piece (pink) is 8.5" h x 5.5" w.  The second piece is slightly smaller at 8.375" x 5.375".  I added a dashed score line to the larger piece using the line creator and centered it so the card would fold in half.  I added a solid line and centered it to the smaller piece.  This line will be used as a guide and deleted later.


Next move everything off your mat, but the traced shape.  Select the shape by clicking on it and then click on the Pop Up Panel button on the right hand side.

Click on the Convert Selected Shapes in the Pop Up Menu.  This will add lines to your shape.


The Pop Up Creator creates a number of "support struts" that will make your shape pop out.  For cutting simplicity, it's easier to have fewer of these struts.  By increasing the number in the Minimum Strut Width, the number of struts will decrease.  I kept enlarging my number until I had 3 struts.  This is a good number for support and will take less time to cut.


Next you want to adjust the base width.  This is the size of the connection that will connect the bottom of your shape to the base.  I increased the number in the base width until the supports were just slightly narrower than the feet of my cat.


One final adjustment to the shape... You will want to increase the length of the score lines by increasing the Dash Pitch Number.  This will make for easier, shorter cutting time.


Now you want to add the pop up shape to your smaller card base.  Add the smaller base to your mat.  Move the Pop up shape so that the bottom most score lines align with the temporary center guide line you created.  Next, select both the card base and the pop up shape and align them so that they are centered using the Transform button.  Make sure the bottom score line is still aligned flush with the temporary guide line.


Delete your temporary guide line, and extend the score line on the bottom of the pop up shape by clicking on the red dot and dragging almost to the edge.  Repeat for the other side.


You can adjust how deeply the shape pops out by clicking on the dot on the center of the shape and dragging down to make it stick out more, or up for less.  Make sure that the height of the pop up shape is not higher than the height of your card when closed or it will stick out of the top.


Once you're happy with the placement, select both the pop up shape and the base, right mouse click and select group.


One more optional step.  If you look at the card I created you'll notice I cut patterned paper to cover the inside of my card which molds itself around the pop out shape.  This is actually pretty easy to do.  Start by creating a copy of your card base.  Select the copy (only) by clicking on it then right mouse click and select make compound path.


Click on the resulting shape to select and then click on the Offset Panel button on the right menu.

Click on the Internal Offset Button, then change the Distance number to be 0.8.  This creates the panel shapes inside the card base.


Drag the inside shapes out to separate and delete the remaining shapes.  I colored them blue in this picture so you can see them.


One final thing before cutting, when you send the pop up piece to cut, you'll notice the top of the shape's lines are grayed out.... this is correct, those lines are not meant to be cut.


Once you've cut all your pieces, they are easy to assemble..


Cut all the pieces and assemble the shape piece if needed.  Add the decorative panels you cut to the inside of the card.  The second picture (B.) shows how to fold the pop out piece.  Add the shape over the pop out design piece, and then glue the pop up base into the slightly larger base, making sure that you do NOT add any adhesive under the pop out pieces.

All that's left is to embellish!  I created a print and cut sentiment using Lori's Abby Font (SVG, Silhouette) and added a bow sticker and enamel hearts.  I also decorated the front of the card as well.  The papers are from Lori's Easter Wishes and Spring Fling collections by Echo Park Paper.


That's it for me today, thanks for stopping by to peek!

Monday, February 4, 2019

Doodlebug Design | French Kiss Pop Up Cards

The French Kiss Cut files are so stinking cute... and combined with the French Kiss papers and embellishments, you can't help but make something special!  I used a few of the cut files to create some fun pop up Valentine's cards using the pop-up creator in my Silhouette software.  Take a peek...


When the cards are opened, the designs pop out!  They also fold flat for mailing, so I added designs to the outside as well.


 Here are some close-ups of each of the cards...


I love the little hot air balloon!  I thought it went perfectly with the cloud paper from the 6x6 pad! 


How cute is that little pug???  And the punny sentiment from the chit chat pieces... they combine to make the most adorable valentine!


I love the little girl with the balloon, she reminds me of my daughter.  In front of the Eiffel tower, she looks so sweet!


Of course, interactive cards are best seen in action so I put together this little video...


I will have a tutorial Thursday week showing how to create these cards in Silhouette.  Have you made any cards or projects using the French Kiss Collection or cut files?  Be sure to tag Doodlebug Design on Social media!  We would love to see your creations!  That's it for me today, thanks for stopping by to peek!

Products Used

Cut Files  

Other
Silhouette Cameo
Silhouette Designer Edition Software (for pop up capability)
Pinsetter Font

Wednesday, January 16, 2019

Doodlebug Design | French Kiss Pop Up Cards

Doodlebug Design's Valentine/Love themed collections are always a favorite for me.  So when I received my big box of French Kiss Goodies, I set out to find a fun, new way to feature the adorable icons and gorgeous papers from the collection.  I came up with pop-up "wiper" cards... take a peek...


When the cards are open as shown above, they have a little pop up feature... the perfect way to showcase the adorable Odds & Ends pieces!  Closed, they fit in a regular envelope.  I love how the collection can be used for everyday cards as well as Valentines!


They are better in action, so I dusted off my Photoshop skills and made a little video....


I just love the little pop-ups!  It's like a game of peek-a-boo!  Here are some close-ups of the cards while opened... I think my favorite is that adorable little Frenchie!!


Have you created any projects using French Kiss?  Make sure to tag @doodlebugdesign on social media so we can see!  That's it for me today, thanks for stopping by to peek!

Products Used


Monday, January 29, 2018

Lori Whitlock: Pop Up Kitty Card


Hi Everyone! Today I'm showcasing one of Lori Whitlock's new Pop Up Card Cat (SVG, Silhouette) !  Being a crazy cat lady, this card was right up my alley!! This card is super easy to assemble (see the video tutorial here)  I decided to customize it for my friend Jenn who has a sassy black and white kitty named Mr. Harley.


To add the black patches, I cut the face, tail and body of the cat from both black and white cardstock.  I then cut the black cardstock to reflect Mr. Harley's coloring and gave him a bow-tie as well.  To finish, I cut some decorative panels for the inside of the card from some Doodlebug Design's So Punny papers.( they are sized 3.875" x 5.125").  There's also a dog version of this card (SVG, Silhouette) ... you could customize for your "dog mom" friends! Here is a picture of the real Mr. Harley... you can follow his antics on Instagram here!


 I can't wait to send it to my friend!  That's it for me today, thanks for stopping by to peek!