Showing posts with label Echo Park Paper. Show all posts

Thursday, January 5, 2023

Lori Whitlock | 5x7 Grid Pop Up Card Tutorial

Hi Everyone!  I'm back with another fun 5x7 Grid Pop Up Card from Lori Whitlock today!  In addition to the seasonal versions of this card type, Lori has a fun 5x7 Grid Pop Up Birthday Bundle.  I have a few January birthdays coming up so I decided to make the 5x7 Grid Pop Up Card Birthday Balloons version (SVG, Silhouette).  I pieced it together with papers from Lori's Pets Collection for Echo Park Paper.  Take a peek...


I put together a quick tutorial showing just how easy these cards are to assemble.... 


Start by cutting the pieces of your card.  You will have three plain bases (bottom) and three decorated inserts.  Next add the different elements to the inserts.  I cut and added the stars, balloons and banner to the front facing pieces (the clouds are part of my patterned paper).  I also print and cut the sentiment piece using the print and cut feature of my Silhouette.  This piece goes on the back of the largest insert.


Next you want to start assembling your "grid".  Start wit the three plain bases.  The two smaller bases go on the outer sides with the larger in the middle.  Slide the front star insert into the front-most slits in each of the base pieces as shown.  The bottoms should be flush.  You may need to wiggle them a little to get them there.

Next add the second insert with the balloons.  You want to slide it into the second set of slits in the base pieces.


Lastly, repeat the process with the largest background insert.  Slide it into the last row of slits until the bottoms are all flush.

Once assembled this card folds flat to fit into a standard A7 (5.25" x 7.25") envelope.  


That's it for me today, thanks for stopping by to peek!


Thursday, January 20, 2022

Lori Whitlock | Pop Up Birthday Cake Card

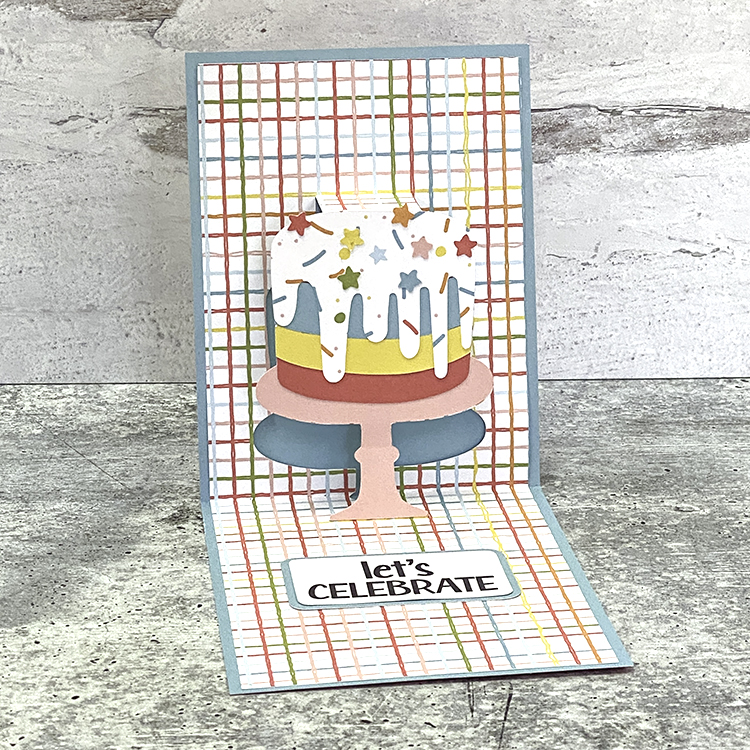
Hi Everyone!  Today I have one of Lori's fun new cards from the Awesome Birthday Card Bundle.  This Happy Birthday Pop Up Cake Card 2 (SVG, Silhouette) is such a fun card, and really easy to put together.  I put my version together with Echo Park Paper's new Birthday Girl Collection, take a peek...

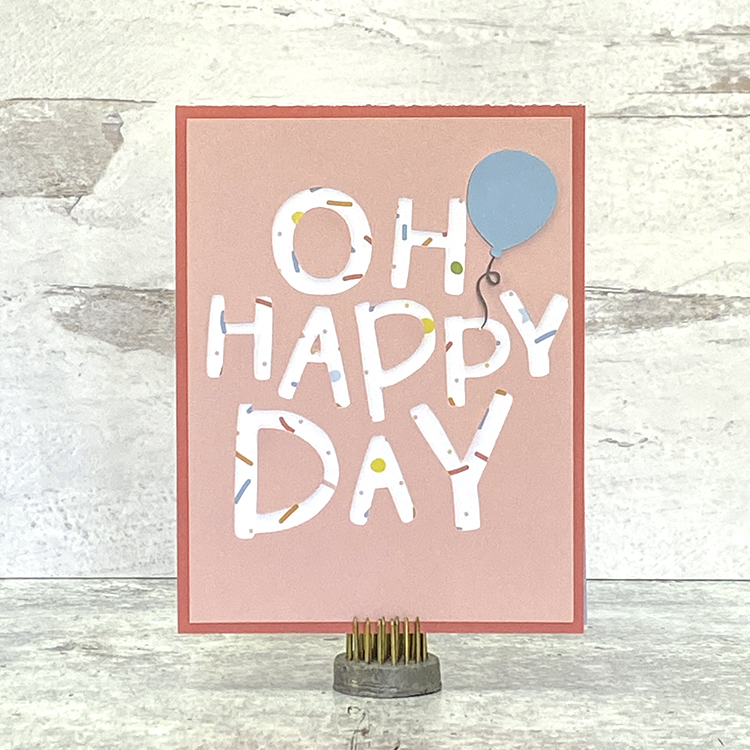
And the outside is just as cute!

I put together some easy instructions for this card.  Head over to Lori's Blog for the full tutorial.  That's it for me today, thanks for stopping by to peek!


Tuesday, April 13, 2021

Lori Whitlock | April Creative Team Blog Hop


Hi Everyone!   It's time for the April Creative Team Blog Hop over at Lori Whitlock!  You should have arrived here from Traci's Blog.  Here's the order for today's hop!

Corri Garza

I made a fun card gift set using the new A2 Insert Card Flower Bundle and Lori's A2 Card Envelope Box (SVG, Silhouette)


This cute little box easily holds the 7 cards and envelopes.  I pieced everything together with Echo Park Paper's new A Slice of summer Collection.


Here are close-ups of the individual cards...


A2 Insert Card Flower Happy Birthday (SVG, Silhouette)
A2 Insert Card Flower With Sympathy (SVG, Silhouette)
A2 Insert Card Flower Have a Lovely Day (SVG, Silhouette)


A2 Insert Card Flower Have a Good Day (SVG, Silhouette)
A2 Insert Card Flower Hello Friend (SVG, Silhouette)


A2 Insert Card Flower Thank You (SVG, Silhouette)
A2 Insert Card Flower Get Well Soon (SVG, Silhouette)

There's a sale happening in the Lori Whitlock SVG Shop!  Use code APR2021 to get 30% off all SVGs, Fonts and Commercial Licenses!


Also, how about a free file!!  This file is free for today only!  No code or minimum required.


And finally, how would you like to win a $20 Coupon to the Lori Whitlock SVG Shop?


Your next hop stop is Anita.  Thanks for stopping by to peek!

Thursday, November 5, 2020

Lori Whitlock | Christmas Countdown Step Card

Christmas will be here before we know it.  To help count the days, I created this fun little Christmas Countdown Step Card (SVG, Silhouette ) for Lori, and it was released this week!  It's such a fun card... you can make one for yourself, or mail one off (I recommend a 5x7 padded envelope) to someone special!  I pieced this one together using A Lumberjack Christmas from Echo Park Paper.  

I put together an assembly tutorial for this card and it's available on Lori's Blog here.  If you make one, be sure to tag Lori Whitlock on Facebook and Instagram, I'd love to see your creations!  That's it for me today, thanks for stopping by to peek!

Friday, September 18, 2020

Lori Whitlock | Halloween Scene Card

 There's a chill in the air and Halloween Candy on the shelves! (and in my stomach, I have no willpower).   It's time to get started on your Halloween Cards!  I created this Floating Easel Halloween Scene Card for Lori Whitlock and it is available in Lori's SVG shop and will be coming to the Silhouette Store soon!  Take a peek...


I pieced it together using some I Love Halloween Collection from Echo Park Paper.  It goes together easily, there is a tutorial on Lori's blog here.  That's it for me today, thanks for stopping by to peek!

Tuesday, September 8, 2020

Lori Whitlock | September Creative Team Blog Hop


Hi Everyone!   It's time for the September Creative Team Blog Hop over at Lori Whitlock!  You should have arrived here from Traci's Blog.  Here's the order for today's hop!

Lori Whitlock
Traci Penrod
Kathy Skou {you are here!}
Anita Mulcahey
Aimee Kidd
Ashley Cook
Corri Garza

I made a couple of the new Halloween-themed Handle Boxes... I pieced the Handle Box Witch's Hat (SVG, Coming Soon to Silhouette) and Handle Box Bat (SVG, Coming Soon to Silhouette)  together using some I Love Halloween Collection from Echo Park Paper.  They are the perfect size to hold some sweet treats!


There's a sale happening in the Lori Whitlock SVG Shop!  Use code SEP2020 to get 30% off all SVGs , Fonts and Commercial Licenses!


Also, how about a free file!!  This file is free for today only!  No code or minimum required.


Finally, how would you like to win a $20 Coupon to Lori's SVG Shop!


a Rafflecopter giveaway Your next hop stop is Anita!  That's it for me today, thanks for stopping by to peek!

Thursday, September 3, 2020

Lori Whitlock | Floating Easel Halloween Cards

Now that it's September, I feel it's OK to start thinking about Halloween (as opposed to July when the candy was added to my local market!)  Halloween may not look the same this year, but we can still celebrate by sending cards to our favorite goblins!  I created two new Floating Easel Cards and they are available in the Lori Whitlock SVG shop this week!  Take a peek...


Floating Easel Card Haunted House (SVG, Silhouette


Floating Easel Card Spider Web (SVG, Silhouette)

I pieced these together using some of the I Love Halloween Collection from Echo Park Paper.  I have an assembly tutorial on Lori's Blog here.  That's it for me today, thanks for stopping by to peek!

Wednesday, July 29, 2020

Lori Whitlock | Purse with Pocket

How cute is this little purse?  It's the new Purse with Pocket SVG file from Lori Whitlock.  Take a peek...


The checked paper is from Lori's Forward in Faith Collection for Echo Park Paper.  It makes the purse look like something you'd find in Nordstrom!  This bag is the perfect size to hold a gift card or a small present.    
That's it for me today, thanks for stopping by to peek!

Tuesday, November 12, 2019

Lori Whitlock | November Creative Team Blog Hop


Hi Everyone!   It's time for the November Creative Team Blog Hop over at Lori Whitlock!  You should have arrived here from Lori's Blog.  Here's the order for today's hop!

Lori Whitlock
Kathy Skou {you are here!}
Anita Mulcahey
Brandie Adams
Michelle Zerull
Aimee Kidd
Ashley Cook

I used Lori's new Christmas Gnome Stickers (SVG, Silhouette) to make a fun Christmas Pop Up Card.  Using Print and Cut Stickers makes it so easy to create multiples of cards which comes in handy at this time of year!  The papers are from Echo Park's My Favorite Christmas Collection.  For a tutorial on how to make the pop up card in Silhouette, see my previous tutorial here.


There's a sale happening in the Lori Whitlock SVG Shop!  Use code NOV2019 to get 25% off all SVGs and Commercial Licenses!


Also, how about a free file!!  This file is free for today only!  No code or minimum required.


Finally, how would you like to win a $20 Coupon to Lori's SVG Shop!


Your next hop stop is Anita!  That's it for me today, thanks for stopping by to peek!

Thursday, October 10, 2019

Lori Whitlock | Gift Bag

Have you seen the new sticker sets in the Lori Whitlock SVG Shop?  There are 2 new Birthday Sets (Birthday Stickers (SVGSilhouette), Birthday Stickers 2 (SVGSilhouette)) and a new set of Fall Stickers (SVGSilhouette).  These stickers can be used for a number of different projects... in addition to planners, you can use them on cards, gift bags, etc.  Individual stickers can be resized... larger for a gift bag for instance or you can print a few of the same stickers to make cards in multiples.  I used the new fall stickers to decorate a little gift bag.  Take a peek...


I used Echo Park Paper's My Favorite Fall to make the bag, along with Lori's Gift Bag with Scallop Handle (SVG, Silhouette).  Head over to Lori's Blog to see a tutorial showing how to print and cut stickers for various projects.
Have a great day!

Monday, September 16, 2019

Lori Whitlock | Fall Decorated Gift Bag

Happy Monday everyone!  If you haven't looked recently, Lori Whitlock has created a number of new box & bag cut files.  I love these files because they can be decorated for any occasion!  I made the new Gift Bag with Magnet Velcro Handle (SVG, Silhouette) to hold a gift card for a friend.  I decorated it with one of her new flowers, Rolled Flower 48 (SVG, Silhouette) for a fun fall look.


 I love how the flower looks like a fall chrysanthemum!  I used Echo Park's My Favorite Fall Collection to piece this all together.  For more gift packaging ideas, check out the new Bag Box and Gift Card Holder Bundle in the Lori Whitlock SVG Shop!


All of these files are also available individually in Lori's SVG Shop and in the Silhouette Store.  That's it for me today, thanks for stopping by to peek!

Tuesday, September 10, 2019

Lori Whitlock | September Creative Team Blog Hop


Hi Everyone!   It's time for the September Creative Team Blog Hop over at Lori Whitlock!  You should have arrived here from Traci's Blog.  Here's the order for today's hop!

Lori Whitlock
Traci Penrod
Anita Mulcahey
Kathy Skou {You are here}
Brandie Adams
Michelle Zerull

Aimee Kidd
Ashley Cook

I made Lori's Extreme Pop-Up Card Fall (SVG, Silhouette).  I just adore the little hedgehog!!! I used some of the My Favorite Fall Collection from Echo Park for the front of the card.


There's a sale happening in the Lori Whitlock SVG Shop!  Use code SEP2019 to get 25% off all SVGs and Commercial Licenses!


Also, how about a free file!!  This file is free for today only!  No code or minimum required.


Finally, how would you like to win a $20 Coupon to Lori's SVG Shop!

a Rafflecopter giveaway


Your next hop stop is Anita!  That's it for me today, thanks for stopping by to peek!

Thursday, August 15, 2019

Lori Whitlock | Teacup Box Card

I'm up on the Lori Whitlock Blog today with a tutorial showing how to assemble this fun Teacup Shaped Box Card.  These cards make such a pretty gift and can be displayed long after it is received!


I pieced this one together with some papers from Lori's My Favorite Fall Collection from Echo Park Paper.  I love the color combination!  For full details see my post on Lori's Blog here.  That's it for me today, thanks for stopping by to peek!


Tuesday, July 9, 2019

Lori Whitlock | July Creative Team Blog Hop


Hi Everyone!   It's time for the July Creative Team Blog Hop over at Lori Whitlock!  You should have arrived here from Traci's Blog.  Here's the order for today's hop!

Lori Whitlock
Traci Penrod
Kathy Skou {You are here}
Anita Mulcahey
Michelle Zerull

Ashley Cook

I made two of Lori's newest files, the Pop Up Card Shell Mermaid (SVG, Silhouette) and the Box Shell Mermaid (SVG, Silhouette).


Wouldn't this make the cutest gift set??  I used papers from Echo Park Paper for both items.

There's a sale happening in the Lori Whitlock SVG Shop!  Use code JUL2019 to get 25% off all SVGs and Commercial Licenses!


Also, how about a free file!!  This file is free for today only!  No code or minimum required.


Finally, how would you like to win a $20 Coupon to Lori's SVG Shop!

a Rafflecopter giveaway

Your next hop stop is Anita!  That's it for me today, thanks for stopping by to peek!


Thursday, February 7, 2019

Lori Whitlock | Silhouette Pop Up Creator Tutorial

Hi Everyone, I’m on the Lori Whitlock blog today with a fun tutorial showing how to use the Silhouette Pop Up Creator which is available in Silhouette Design Studio starting with version 4.1.  This is such a fun way to use all the shapes in your Silhouette Library!  I made this sweet kitty Valentine card using the cat from Lori Whitlock's Bobble Head Card Cat (SVG, Silhouette) and the Pop Up Creator.


To start, you want to select your shape.  Then trace your shape using the trace tool in Silhouette.  You also want to create two card base pieces, my first piece (pink) is 8.5" h x 5.5" w.  The second piece is slightly smaller at 8.375" x 5.375".  I added a dashed score line to the larger piece using the line creator and centered it so the card would fold in half.  I added a solid line and centered it to the smaller piece.  This line will be used as a guide and deleted later.


Next move everything off your mat, but the traced shape.  Select the shape by clicking on it and then click on the Pop Up Panel button on the right hand side.

Click on the Convert Selected Shapes in the Pop Up Menu.  This will add lines to your shape.


The Pop Up Creator creates a number of "support struts" that will make your shape pop out.  For cutting simplicity, it's easier to have fewer of these struts.  By increasing the number in the Minimum Strut Width, the number of struts will decrease.  I kept enlarging my number until I had 3 struts.  This is a good number for support and will take less time to cut.


Next you want to adjust the base width.  This is the size of the connection that will connect the bottom of your shape to the base.  I increased the number in the base width until the supports were just slightly narrower than the feet of my cat.


One final adjustment to the shape... You will want to increase the length of the score lines by increasing the Dash Pitch Number.  This will make for easier, shorter cutting time.


Now you want to add the pop up shape to your smaller card base.  Add the smaller base to your mat.  Move the Pop up shape so that the bottom most score lines align with the temporary center guide line you created.  Next, select both the card base and the pop up shape and align them so that they are centered using the Transform button.  Make sure the bottom score line is still aligned flush with the temporary guide line.


Delete your temporary guide line, and extend the score line on the bottom of the pop up shape by clicking on the red dot and dragging almost to the edge.  Repeat for the other side.


You can adjust how deeply the shape pops out by clicking on the dot on the center of the shape and dragging down to make it stick out more, or up for less.  Make sure that the height of the pop up shape is not higher than the height of your card when closed or it will stick out of the top.


Once you're happy with the placement, select both the pop up shape and the base, right mouse click and select group.


One more optional step.  If you look at the card I created you'll notice I cut patterned paper to cover the inside of my card which molds itself around the pop out shape.  This is actually pretty easy to do.  Start by creating a copy of your card base.  Select the copy (only) by clicking on it then right mouse click and select make compound path.


Click on the resulting shape to select and then click on the Offset Panel button on the right menu.

Click on the Internal Offset Button, then change the Distance number to be 0.8.  This creates the panel shapes inside the card base.


Drag the inside shapes out to separate and delete the remaining shapes.  I colored them blue in this picture so you can see them.


One final thing before cutting, when you send the pop up piece to cut, you'll notice the top of the shape's lines are grayed out.... this is correct, those lines are not meant to be cut.


Once you've cut all your pieces, they are easy to assemble..


Cut all the pieces and assemble the shape piece if needed.  Add the decorative panels you cut to the inside of the card.  The second picture (B.) shows how to fold the pop out piece.  Add the shape over the pop out design piece, and then glue the pop up base into the slightly larger base, making sure that you do NOT add any adhesive under the pop out pieces.

All that's left is to embellish!  I created a print and cut sentiment using Lori's Abby Font (SVG, Silhouette) and added a bow sticker and enamel hearts.  I also decorated the front of the card as well.  The papers are from Lori's Easter Wishes and Spring Fling collections by Echo Park Paper.


That's it for me today, thanks for stopping by to peek!