Thursday, November 29, 2018

Lawn Fawnatics | Challenge 41 Shaped Cards

I'm in just under the wire, but I finally found some time to play along with the latest challenge over at Lawn Fawnatics...Challenge 41 Shaped Cards!  For some reason, I immediately thought of a postage stamp as a good shape, so I created a cut file on Silhouette to make one.  All that was left was coming up with a cute little scene...


I used the Nutty or Nice Stamps and dies (the Simon Says Stamp Exclusive set from Stampember), the Christmas Dreams Stamps and Dies and the Simple Stitched Hillside Borders to make my scene.  The papers are from the Really Rainbow Christmas 6x6 Pad along with some Gold Holiday Sparkle Cardstock to add a little bling!  I finished it off with some Gold Stickles on the tree.
That's it for me today, thanks for stopping by to peek!

Monday, November 26, 2018

Doodlebug Design | Christmas Town Countdown Step Card Tutorial

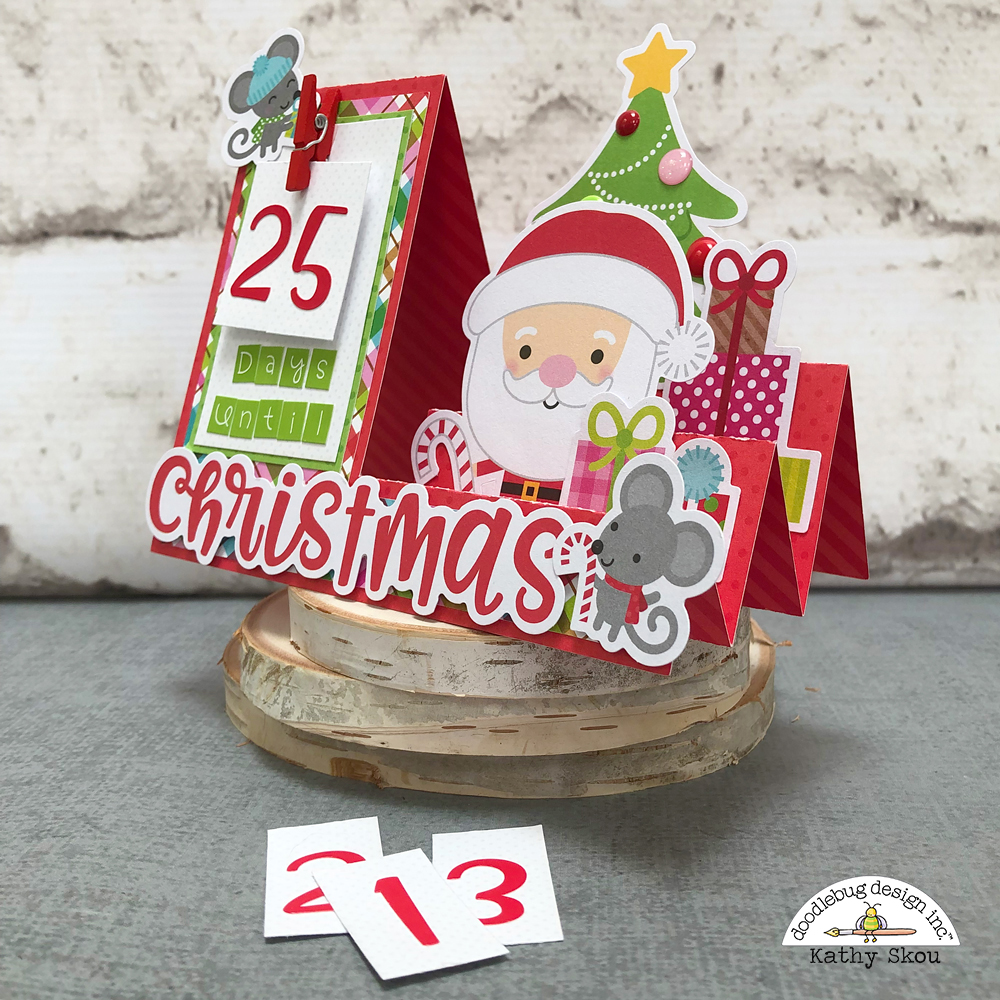
I think that one of my favorite all time Doodlebug Products are the Odds & Ends packs!  They make it so easy to create fun little embellishment clusters and scenes!  I decided to combine them with a fun side step card base to create a fun Christmas Town Christmas Countdown card!  You could send this card to family & friends or just use it to count down to Christmas in your own house!  Take a peek...


How cute is this little calendar??  When my daughter was little it would be a big deal to change the countdown number every day!!  The card looks complicated, but it's really pretty simple to make.  I started with the base from this side step card by Lori Whitlock (SVG, Silhouette).  If you don't have an electronic cutter, you can still make the base with a score board or a trimmer and scoring tool.  I've done out the measurements for you here (the dotted lines are score lines, and the solid line is a cut line)


Once you've cut and scored the base piece, all that is really left is to decorate!!  For my card, I added the different Christmas Town Odds & Ends and Chit Chat pieces onto the different steps of the card to create a little scene.


For the numbers, I cut the lily white Dot-Stripe Petite Prints paper from the 6x6 pad into  0.75"x 1.5" pieces and added numbers from the Ladybug Abigail Stickers. (you will need 2 each of the numbers 1 & 2, then one each of 0 and 3-9 for a 25 day countdown) I cut a small frame for the countdown base, measuring 2"x3" and added some Limeade Teensy Type letters to the bottom. To hold the numbers on the card, I glued on one of the Christmas Mini Clothespins.  I used glossy accents to glue it to make it very secure. 


Finally I added a little pocket to the back of my card to hold the numbers.  I used this file from Lori Whitlock (SVG, Silhouette) which I re-sized to be approximately 2.25" x 3.25".  You could use a small envelope or bag as well.

I had so much fun making this card, I decided to make a couple of more to show the versatility! In place of the countdown you could also add your Christmas Photo like I did on this card.


I used a piece of transparency (available in your local office supply store) and glued it to the last step.  I added some snowflake stickers from the Christmas Town Icon Stickers.  They look like they are floating in the air above the card! I also used a piece behind the chit chat piece as well.   I just trimmed off the extra, but you could leave it if you didn't want to cut it.


Finally I just made a card featuring all Odds & Ends and Chit Chat pieces...


I used a transparency on this card as well to hold the Ho Ho Ho pieces.


These side step cards really are fun to make and when you combine them with the Chit Chat and Odds & Ends pieces, the creative possibilities are really endless!  If you decide to try one please be sure to tag @doodlebugdesign on social media so that we can see your creations!  That's it for me today, thanks for stopping by to peek!


Tuesday, November 13, 2018

Lori Whitlock | November Creative Team Blog Hop


Hi Everyone!   It's time for the November Creative Team Blog Hop over at Lori Whitlock!  You should have arrived here from Traci's Blog.  Here's the order for today's hop!

Thanksgiving is almost here in the US, so I decided to make the new Turkey Fry Box (SVG, Silhouette) to fill with some treats for my host!


The papers are the new Dot-Stripe Petite Prints from Doodlebug Design.

There's a sale happening in the Lori Whitlock SVG Shop!  Use code NOV2018 to get 30% off all SVGs and Commercial Licenses!


Also, how about a free file!!  This file is free for today only!  No code or minimum required.


Finally, how would you like to win a $20 Coupon to Lori's SVG Shop!


a Rafflecopter giveaway

That's it for me today, your next stop on the hop is Brandie!  Have a great day!


Monday, November 12, 2018

Doodlebug Design | Christmas Town Advent Calendar

The holidays are upon us!  I was so excited to see the new  Doodlebug Design Christmas Town Collection... the little characters and icons are too cute! I thought they would be adorable as part of an Advent Calendar... so I decided to make one!   I worked with my Silhouette Model Maker Software and designed my first SVG file!  I work for Lori Whitlock so she helped me to fine-tune the details.  I'm so happy with the results, and it's even cuter using the new Christmas Town Collection!  Take a peek...


For the tree base and star I used some new Dot-Stripe Petite Prints in Grasshopper and Lemon.  I added the little pockets using some of my favorite patterned papers from the Christmas Town collection including the Festive Flurry, Christmas Cookies, Snow Much Fun, Christmas Jammies, Berry Christmas, and Merry Hearts.  I then decorated each pocket using the Icon Stickers Sheet, Mini Icons, Baby Hearts Shape Sprinkles, Holly Berries Shape Sprinkles, and Festive Flurry Shape Sprinkles.  Here are some close-ups of the pockets...


It's going to be so fun to countdown with this sweet {literally lol} calendar! The tree file is available in the Lori Whitlock SVG Shop and will be available in the Silhouette Store Soon!   Be sure to stop by the Doodlebug Design Blog all week for more Christmas Town Inspiration from the Design Team!  That's it for me today, thanks for stopping by to peek!


Monday, November 5, 2018

Lori Whitlock | Turkey Tag Bag

Hi Everyone!  I can't believe it is already November, this year has flown by!  Halloween is gone and now we're headed into the Thanksgiving season!  I always love Thanksgiving, it's one holiday that truly feels like it's all about getting together with the ones you love, and sharing some time (and turkey of course!)  This year, I'm not cooking so I thought it would be nice to bring a little something to my host.  Lori's new Tag Bags are the perfect wrapping for a little something special!  I made the Tag Bag Turkey (SVG, Silhouette).   Take a peek...


How cute is that turkey??  I made my bag using papers from Doodlebug Design.  These bags are great because you can cut 2 of them from one piece of 12x12 paper, so they're easy to mass produce!  You could even use them as place cards!  Lori has a great assembly tutorial on her YouTube Channel here.  Be sure to check out all of the Tag Bag designs here!  That's it for me today thanks for stopping by to peek!


Monday, October 29, 2018

Doodlebug Design | Pumpkin Party Cut Files

Not long ago, my niece sent me this fabulous picture of my great-niece and great-niece-pup.  As soon as I saw it, I knew I was going to have to scrap it!  When I saw the new Pumpkin Party Cut files which are available in the Lori Whitlock SVG Shop and the Silhouette Store I was immediately inspired!  Take a peek...


That face!!!  Such personality!  I wanted the picture to be the focus so I enlarged it to be 9.5" x 9.5".  I backed it with some new Dot-Stripe Petite Prints in Mandarin and Lilac, and then with the Party Plaid Paper from the Pumpkin Party Collection.  I cut the Pumpkin Party - Pumpkins in a few different sizes from some Dot-Stripe and Floral-Graph Petite Prints in Mandarin.     Here's a hint to make the pumpkins look different... In addition to resizing them I also used the flip horizontally function in Silhouette to make the same file slightly different.


I also added the Web and spider from the Pumpkin Party Web Lantern file to the corner of my layout using some Beetle Black Dot Stripe Petite Prints.  I made the spider 3D by cutting two of the spiders, then cutting one so that it was just the body.  I then layered them with some foam tape between the layers for dimension.  The eyes are from the Eerie Eyes Shaped Sprinkles and the speech bubble is from the Pumpkin Party Chit Chats.


I finished off my layout with my title which was made from Tangerine Abigail and Teensy Type Alpha Stickers.  I love mixing fonts!  Have you created a project using the Pumpkin Party Collection or Cut Files?  Be sure to tag Doodlebug Design on Social Media so that we can see your creations!  That's it for me today, thanks for stopping by to peek!


Monday, October 22, 2018

Lawn Fawnatics | Challenge 39 Bling it Out

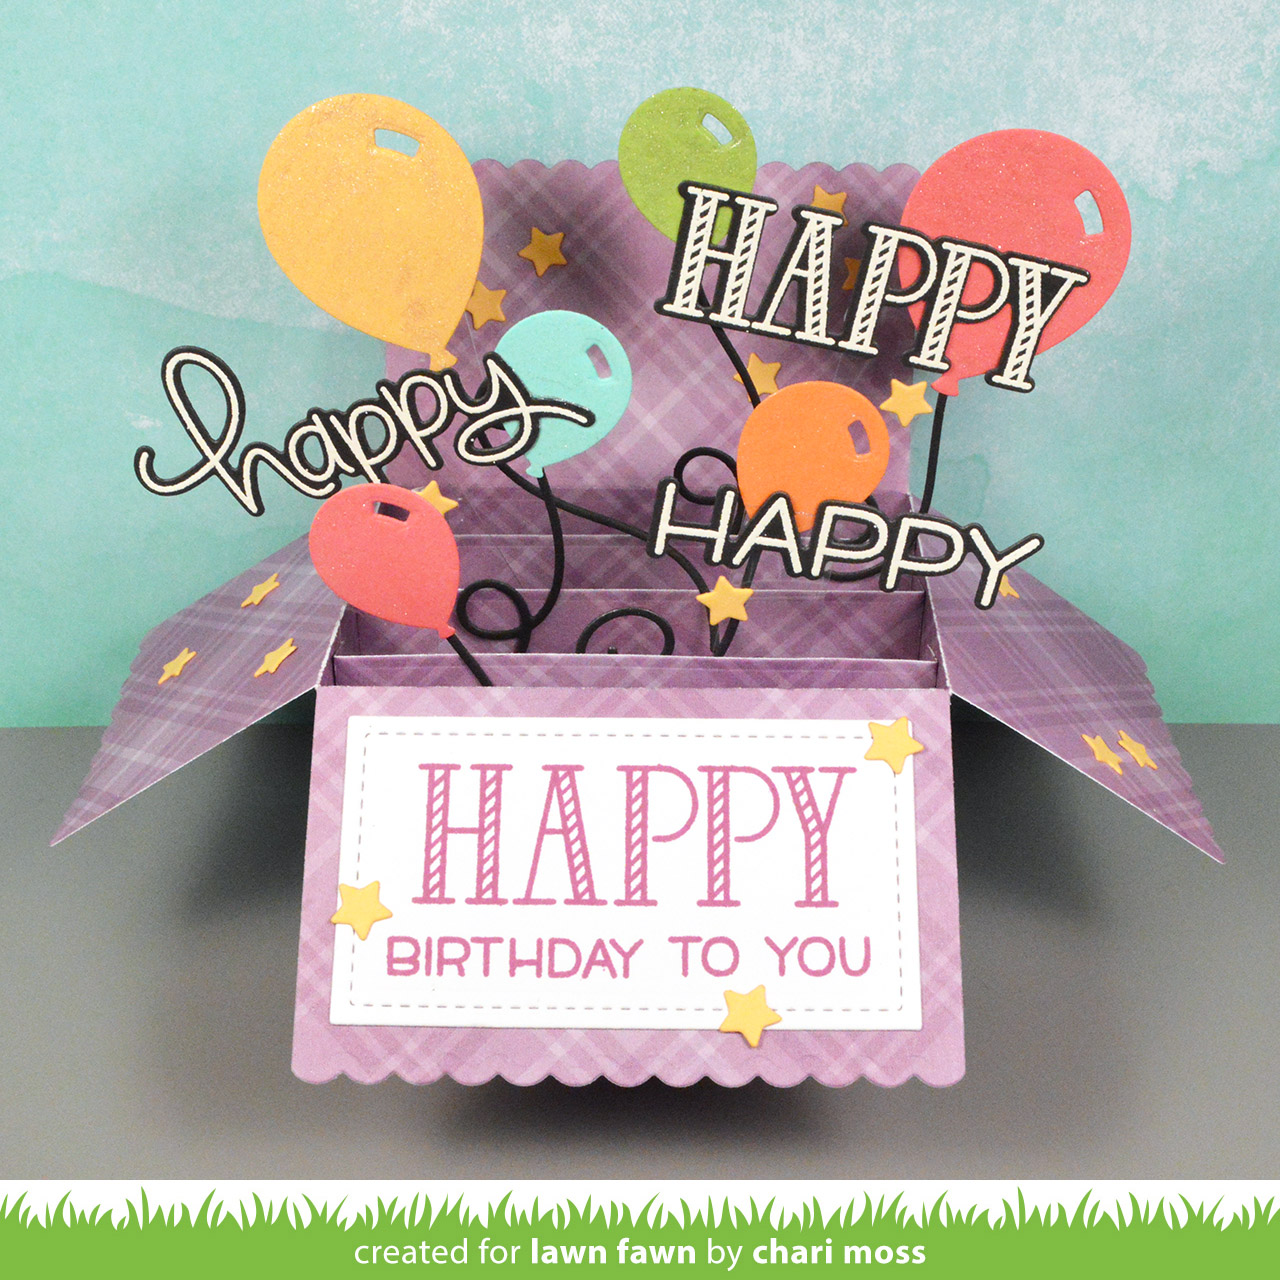
Hi Everyone!  I was able to play along with the current challenge over at Lawn Fawnatics... Bling it Out!  The challenge was to add some sparkle to your project.  I had to make a 30th Anniversary card for some friends so I decided to make a box card for them (inspired by this card by Chari Moss for Lawn Fawn)  take a peek...


I used a number of Lawn Fawn stamps and dies for this card including the Scalloped Box Card Pop Up Dies, Happy Happy Happy, Party Balloons, and Louie's ABCs & 123s.  I used papers from the following Lawn Fawn Collections:   Perfectly Plaid Fall, Polka Dot Mon Amie, Perfect Plaid Chill and Knit Picky Fall.  For my bling, I added sequins to the balloons and 30 and I also used my Nuvo Glitter Gloss brush pen to add some sparkle to the 30 and hearts.  The happy couple loved the card!

That's it for me today, thanks for stopping by to peek!