Showing posts with label Dot Stripe Petite Prints. Show all posts

Monday, May 13, 2019

Doodlebug Design | Seasonal Welcome Sign

Do you decorate for the seasons?  I have friends who completely redecorate for each holiday, or season.  I don't go that far, but I do love to change things up a little!  I decided to make a fun welcome sign for my entryway that I could change each month.  


I started with a 40" x 8" whitewashed board.  I cut the letters from chipboard, then from the checked side of the Simply Spring Under My Umbrella paper.  I layered them to give them a little more substance and glued to the board. I then set to creating the "O" in welcome for each month using Doodlebug's fun cut files.  Each of the shapes used to form the "O" are attached with Velcro so they can easily be changed up each month.  I pieced together each shape using Dot Stripe Petite Prints and backed them with chipboard to make them more sturdy.  


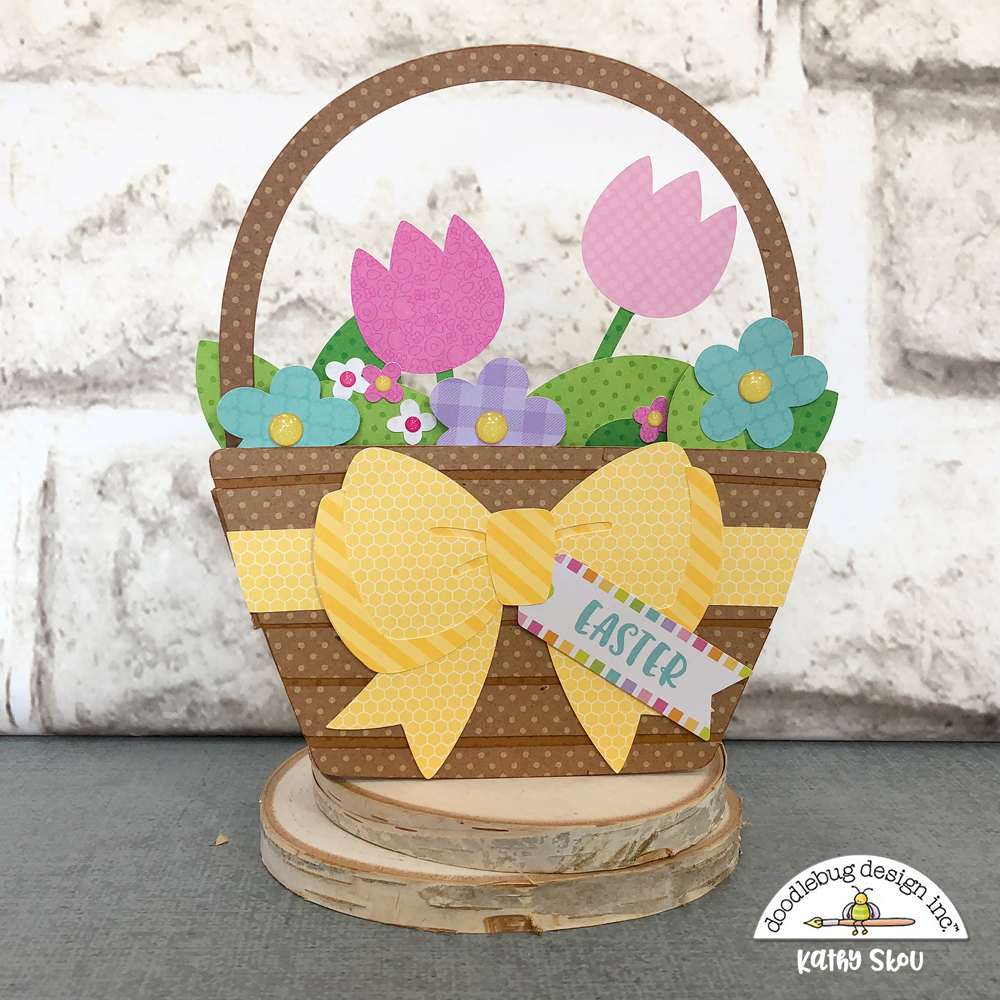
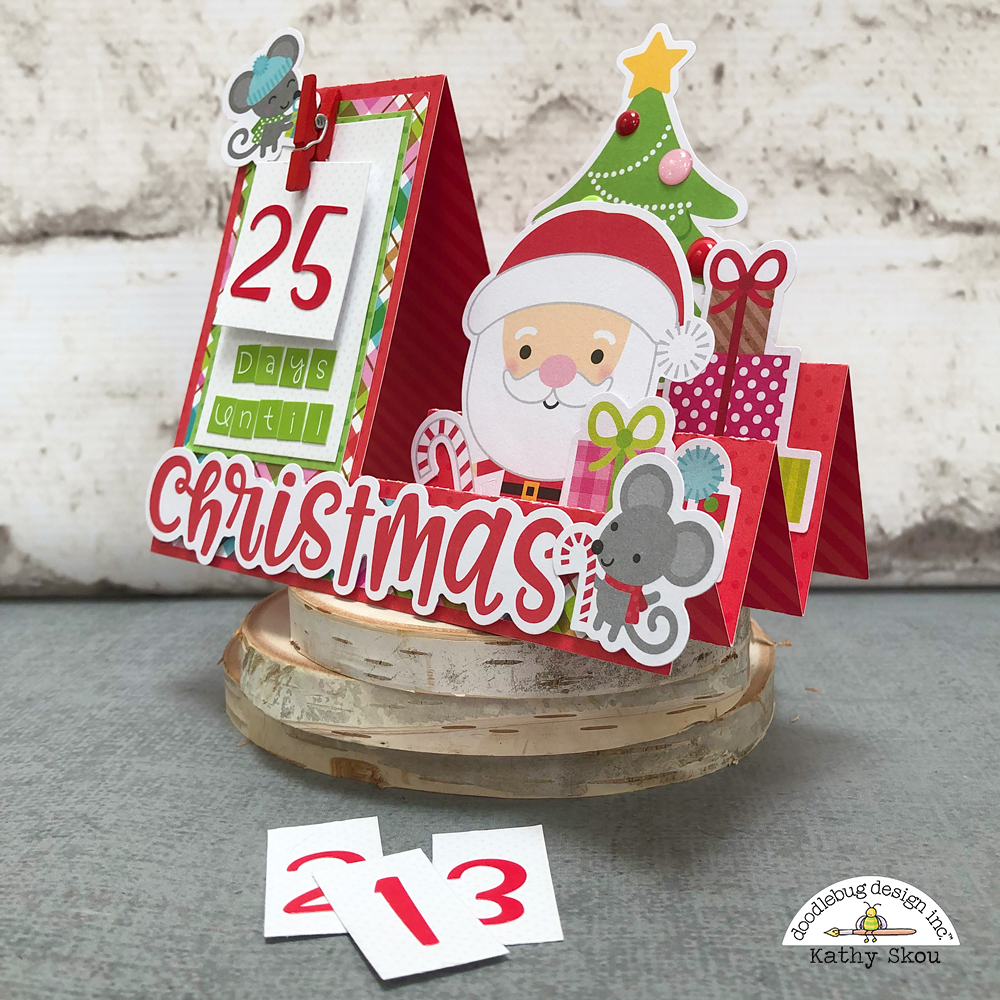
Here is a look at each month's icon...


They all look so cute on the sign!  Take a peek...
January - April


May-August


September - December


I have the sign standing in the corner of my entryway, but you could also hang it on a wall if you wanted.  I love how the sign looks and it makes me feel a bit more festive!  That's it for me, thanks for stopping by to peek!


Doodlebug Products Used
Simply Spring Collection - Under My Umbrella
Petite Prints Collection - Dot and Stripe - Bubblegum
Petite Prints Collection -Dot and Stripe - Cupcake
Petite Prints Collection - Dot and Stripe - Ruby
Petite Prints Collection - Dot and Stripe - Cherry
Petite Prints Collection - Dot and Stripe - Coral
Petite Prints Collection - Dot and Stripe - Lemon
Petite Prints Collection - Dot and Stripe - Citrus
Petite Prints Collection - Dot and Stripe - Limeade
Petite Prints Collection - Dot and Stripe - Pistachio
Petite Prints Collection - Dot and Stripe - Blue Jean
Petite Prints Collection - Dot and Stripe - Lilac
Petite Prints Collection - Dot and Stripe - Kraft
Petite Prints Collection - Dot and Stripe - Bon Bon
Petite Prints Collection - Dot and Stripe - Beetle Black
Petite Prints Collection - Dot and Stripe - Lily White
 Lots O' Luck Collection - Sprinkles - Self Adhesive Enamel Shapes - Lucky Ladies
Sprinkles - Beetle Black
Sprinkles - Lily White
Glitter Sprinkles - Limeade
Simply Spring Collection - Sprinkles - Little Critters
Simply Spring Collection - Odds and Ends
Glitter Sprinkles - Bon Bon

Other
Plywood Board 40" x 8"
LW Block Font
Adhesive Velcro Strips
Craft Glue
Silhouette Chipboard

Saturday, May 4, 2019

Doodlebug Design | Hap-pea National Scrapbooking Day

Happy interNational Scrapbooking Day! We are celebrating all day over on the Doodlebug Design Blog.  I hope that you're able to get into your craft space and create today!  I was lucky enough to find some time to play today...so I pulled out my Doodlebug stash and my Silhouette and got to work!  As soon as I saw the adorable little vegetables in the Hoppy Easter Cut Files Collection, I knew I had to create a card for my gardening friend!  I saw the pea file, and my mind started churning... I decided to make a 3D box card with it!  Take a peek...


I started with the Hoppy Easter Peas File to make the pea pod box shape and the Hap-pea Birthday sign.  I added faces to the peas (I used the faces from the Simply Spring Bees file)  It needed one more thing so I decided to add little birthday hats to the peas.  I made the hats using the Sweet Party Hats File from the Fairy Tales collection.   The card folds flat for mailing.  I know my friend will love it!  Are you using any Doodlebug Cut Files or Collections for a project today?  Make sure to tag Doodlebug Design on social media, we'd love to see your creations!


Products Used:

Petite Prints Collection - 12 x 12 Double Sided Paper - Dot and Stripe - Citrus
Petite Prints Collection - 12 x 12 Double Sided Paper - Dot and Stripe - Limeade
Petite Prints Collection - 12 x 12 Double Sided Paper - Dot and Stripe - Grasshopper
Petite Prints Collection - 12 x 12 Double Sided Paper - Dot and Stripe - Kraft
Petite Prints Collection - 12 x 12 Double Sided Paper - Dot and Stripe - Beetle Black
Hoppy Easter Collection - 6 x 6 Paper Pad
Glitter Sprinkles - Self Adhesive Enamel Dots - Bon Bon

Cut Files:
Hoppy Easter - Peas(SVG, Silhouette)
Sweet Party Hat Fairy Tales (SVG, Silhouette)
Simply Spring Bees (SVG, Silhouette)

Other:
Pinsetter Font (for sign)

Monday, April 15, 2019

Doodlebug Design | Hoppy Easter Cut Files

Have you seen the new Hoppy Easter Cut files available in the Lori Whitlock SVG Shop the Silhouette Store?  I can describe them in two words... cuteness overload! The bunnies, the chicks... absolutely adorable!  I decided to design some box cards with the files so that they can be displayed as decor as well!  Take a peek...


I started with the sweet little Hoppy Easter - Bunny 3 file.  I love how he is peeking out from the flower pot!  I used a combination of Hoppy Easter Papers and Dot Stripe Petite Prints to piece him together.  To complete the card I added some Glitter Sprinkles and the Hoppy Easter Odds & Ends banner piece.


For my next card I used the Hoppy Easter Basket of Flowers file.  I think this is one of my absolute favorites!  I combined papers from Hoppy Easter, Simply Spring and some more Dot Stripe Petite prints to make it, and finished it with some sprinkles and the Easter tag from the Odds & Ends pieces.  I think this would also make a nice card for Mother's Day!


For my last card I used the sweet little chicky from the Hoppy Easter Chick in Eggs File.  I made a full egg for the back drop to make him look like he's just hatching and finished him with some flowers and speech bubble from the Odds & Ends pack.  


Have you created any projects using the Hoppy Easter Collection or Cut files?  We would love to see what you made, so be sure to tag Doodlebug Design on Facebook (@Doodlebug Design) and Instagram(@doodlebugdesign).  That's it for me today, thanks for stopping by to peek!


Products Used:

Hoppy Easter Collection - 12 x 12 Double Sided Paper - Jellybean Plaid
Hoppy Easter Collection - 12 x 12 Double Sided Paper - Sunday Dress
Hoppy Easter Collection - 12 x 12 Double Sided Paper - Hoppy Easter
Hoppy Easter Collection - Odds and Ends - Die Cut Cardstock Pieces
Hoppy Easter Collection - 6 x 6 Paper Pad
Simply Spring Collection - 12 x 12 Double Sided Paper - Bright Bunch
Simply Spring Collection - 12 x 12 Double Sided Paper - Bee Happy
Simply Spring Collection - Sprinkles - Self Adhesive Enamel Shapes - Spring
Glitter Sprinkles - Self Adhesive Enamel Dots - Bumblebee
12 x 12 Double Sided Paper - Dot and Stripe - Lilac
12 x 12 Double Sided Paper - Dot and Stripe - Lily White
12 x 12 Double Sided Paper - Dot and Stripe - Grasshopper
12 x 12 Double Sided Paper - Dot and Stripe - Limeade
12 x 12 Double Sided Paper - Dot and Stripe - Lemon
12 x 12 Double Sided Paper - Dot and Stripe - Bon Bon
12 x 12 Double Sided Paper - Dot and Stripe - Kraft
Kitten Smitten Collection - Matte Sprinkles - Self Adhesive Enamel Dots - Cat 


Monday, March 11, 2019

Lori Whitlock | Chick Favor Box

Hi Everyone!  Spring and Easter will be here before you know it!  Lori has a number of new favor boxes in her shop, and this adorable Chick Favor Box (SVG, Silhouette) is perfect for Spring gift giving!


The box is really simple to assemble, just fold up the sides of the box and glue in place, then add the embellishments. I added some wiggle eyes for my chick box... because everything is more fun with wiggle eyes!  The papers are Dot Stripe Petite Prints from Doodlebug Desig.  The box is the perfect size to hold a small gift or bag of treats.  Lori has a bundle of these cute Animal Favor Boxes here in here shop and they are also available individually in her shop and the Silhouette Store.


That's it for me today, thanks for stopping by to peek!


Thursday, January 17, 2019

Lori Whitlock | Valentine Truck Box Card

Valentine's Day will be here before we know it, so it's the perfect time to start crafting! (as if we need an excuse!)  I love Lori's Whitlock's Truck Box Cards, she has one for Christmas, Easter, Fall... and now Valentine's Day!  Take a peek...


I put this card together using some Dot Stripe Petite Prints and Heart Sprinkles from Doodlebug Design.  This adorable card is available is available in SVG format in Lori's shop here and also in the Silhouette Store here.  It folds flat and fits into an A2 Envelope for easy mailing!  There is a great assembly tutorial for Lori's Truck Box Cards here.

That's it for me today, thanks for stopping by to peek!

Monday, December 3, 2018

Doodlebug Design | Christmas Town Cut File Cards

Christmas Card season is in full swing!!  When I saw the new Doodlebug Design  Christmas Town Cut File Collection, I just knew I had to get cutting!  The only problem was how to narrow down my selections, all of the little icons are just too cute!  I will definitely be making more soon... but I was able to narrow it all down for these cards...


As soon as I saw the adorable Snowman Look Up File, I knew I had to use it!!  His cute little face was too much cuteness to resist!  I decided to make a shaped card, and added a little banner using the Snowflake cut file from the Milk & Cookies Collection.  I used some Lily White Teensy Type letters to add the word JOY to the banner. I used some of the new Dot-Stripe Petite Prints to piece him together.


My next card is a box card I created using the Present Mouse cut file.  I made a box of the present file and had the little mouse pop up from inside!  The tag is from the Christmas Town Chit Chat pieces.  I also added some Doodlebug Sequins in Ladybug to the holly berry for a bit of sparkle!


Since there were so many cute little icons, I wanted to make a little scene card to showcase more of them!  I made a center box card using the base from this cut file from Lori Whitlock and made my own little scene using the Squirrel, Red House, Winter Tree, Tree with Snow, and Snowman with Hat files. Take a peek...


I added some Stickles to the snow for some shine and topped it off with the 'Tis the Season Banner from the Chit Chat pieces.  I love how this card folds flat, but then opens up to such a fun dimensional look!
Be sure to check out all of the Christmas Town Cut files in the Lori Whitlock SVG Shop Here and they will be coming soon to the Silhouette Store!  If you make something using one of the files, be sure to tag Doodlebug Design on Social media so we can see! That's it for me today, thanks for stopping by to peek!


Monday, November 26, 2018

Doodlebug Design | Christmas Town Countdown Step Card Tutorial

I think that one of my favorite all time Doodlebug Products are the Odds & Ends packs!  They make it so easy to create fun little embellishment clusters and scenes!  I decided to combine them with a fun side step card base to create a fun Christmas Town Christmas Countdown card!  You could send this card to family & friends or just use it to count down to Christmas in your own house!  Take a peek...


How cute is this little calendar??  When my daughter was little it would be a big deal to change the countdown number every day!!  The card looks complicated, but it's really pretty simple to make.  I started with the base from this side step card by Lori Whitlock (SVG, Silhouette).  If you don't have an electronic cutter, you can still make the base with a score board or a trimmer and scoring tool.  I've done out the measurements for you here (the dotted lines are score lines, and the solid line is a cut line)


Once you've cut and scored the base piece, all that is really left is to decorate!!  For my card, I added the different Christmas Town Odds & Ends and Chit Chat pieces onto the different steps of the card to create a little scene.


For the numbers, I cut the lily white Dot-Stripe Petite Prints paper from the 6x6 pad into  0.75"x 1.5" pieces and added numbers from the Ladybug Abigail Stickers. (you will need 2 each of the numbers 1 & 2, then one each of 0 and 3-9 for a 25 day countdown) I cut a small frame for the countdown base, measuring 2"x3" and added some Limeade Teensy Type letters to the bottom. To hold the numbers on the card, I glued on one of the Christmas Mini Clothespins.  I used glossy accents to glue it to make it very secure. 


Finally I added a little pocket to the back of my card to hold the numbers.  I used this file from Lori Whitlock (SVG, Silhouette) which I re-sized to be approximately 2.25" x 3.25".  You could use a small envelope or bag as well.

I had so much fun making this card, I decided to make a couple of more to show the versatility! In place of the countdown you could also add your Christmas Photo like I did on this card.


I used a piece of transparency (available in your local office supply store) and glued it to the last step.  I added some snowflake stickers from the Christmas Town Icon Stickers.  They look like they are floating in the air above the card! I also used a piece behind the chit chat piece as well.   I just trimmed off the extra, but you could leave it if you didn't want to cut it.


Finally I just made a card featuring all Odds & Ends and Chit Chat pieces...


I used a transparency on this card as well to hold the Ho Ho Ho pieces.


These side step cards really are fun to make and when you combine them with the Chit Chat and Odds & Ends pieces, the creative possibilities are really endless!  If you decide to try one please be sure to tag @doodlebugdesign on social media so that we can see your creations!  That's it for me today, thanks for stopping by to peek!


Tuesday, November 13, 2018

Lori Whitlock | November Creative Team Blog Hop


Hi Everyone!   It's time for the November Creative Team Blog Hop over at Lori Whitlock!  You should have arrived here from Traci's Blog.  Here's the order for today's hop!

Thanksgiving is almost here in the US, so I decided to make the new Turkey Fry Box (SVG, Silhouette) to fill with some treats for my host!


The papers are the new Dot-Stripe Petite Prints from Doodlebug Design.

There's a sale happening in the Lori Whitlock SVG Shop!  Use code NOV2018 to get 30% off all SVGs and Commercial Licenses!


Also, how about a free file!!  This file is free for today only!  No code or minimum required.


Finally, how would you like to win a $20 Coupon to Lori's SVG Shop!


a Rafflecopter giveaway

That's it for me today, your next stop on the hop is Brandie!  Have a great day!


Monday, November 12, 2018

Doodlebug Design | Christmas Town Advent Calendar

The holidays are upon us!  I was so excited to see the new  Doodlebug Design Christmas Town Collection... the little characters and icons are too cute! I thought they would be adorable as part of an Advent Calendar... so I decided to make one!   I worked with my Silhouette Model Maker Software and designed my first SVG file!  I work for Lori Whitlock so she helped me to fine-tune the details.  I'm so happy with the results, and it's even cuter using the new Christmas Town Collection!  Take a peek...


For the tree base and star I used some new Dot-Stripe Petite Prints in Grasshopper and Lemon.  I added the little pockets using some of my favorite patterned papers from the Christmas Town collection including the Festive Flurry, Christmas Cookies, Snow Much Fun, Christmas Jammies, Berry Christmas, and Merry Hearts.  I then decorated each pocket using the Icon Stickers Sheet, Mini Icons, Baby Hearts Shape Sprinkles, Holly Berries Shape Sprinkles, and Festive Flurry Shape Sprinkles.  Here are some close-ups of the pockets...


It's going to be so fun to countdown with this sweet {literally lol} calendar! The tree file is available in the Lori Whitlock SVG Shop and will be available in the Silhouette Store Soon!   Be sure to stop by the Doodlebug Design Blog all week for more Christmas Town Inspiration from the Design Team!  That's it for me today, thanks for stopping by to peek!


Monday, November 5, 2018

Lori Whitlock | Turkey Tag Bag

Hi Everyone!  I can't believe it is already November, this year has flown by!  Halloween is gone and now we're headed into the Thanksgiving season!  I always love Thanksgiving, it's one holiday that truly feels like it's all about getting together with the ones you love, and sharing some time (and turkey of course!)  This year, I'm not cooking so I thought it would be nice to bring a little something to my host.  Lori's new Tag Bags are the perfect wrapping for a little something special!  I made the Tag Bag Turkey (SVG, Silhouette).   Take a peek...


How cute is that turkey??  I made my bag using papers from Doodlebug Design.  These bags are great because you can cut 2 of them from one piece of 12x12 paper, so they're easy to mass produce!  You could even use them as place cards!  Lori has a great assembly tutorial on her YouTube Channel here.  Be sure to check out all of the Tag Bag designs here!  That's it for me today thanks for stopping by to peek!


Monday, October 29, 2018

Doodlebug Design | Pumpkin Party Cut Files

Not long ago, my niece sent me this fabulous picture of my great-niece and great-niece-pup.  As soon as I saw it, I knew I was going to have to scrap it!  When I saw the new Pumpkin Party Cut files which are available in the Lori Whitlock SVG Shop and the Silhouette Store I was immediately inspired!  Take a peek...


That face!!!  Such personality!  I wanted the picture to be the focus so I enlarged it to be 9.5" x 9.5".  I backed it with some new Dot-Stripe Petite Prints in Mandarin and Lilac, and then with the Party Plaid Paper from the Pumpkin Party Collection.  I cut the Pumpkin Party - Pumpkins in a few different sizes from some Dot-Stripe and Floral-Graph Petite Prints in Mandarin.     Here's a hint to make the pumpkins look different... In addition to resizing them I also used the flip horizontally function in Silhouette to make the same file slightly different.


I also added the Web and spider from the Pumpkin Party Web Lantern file to the corner of my layout using some Beetle Black Dot Stripe Petite Prints.  I made the spider 3D by cutting two of the spiders, then cutting one so that it was just the body.  I then layered them with some foam tape between the layers for dimension.  The eyes are from the Eerie Eyes Shaped Sprinkles and the speech bubble is from the Pumpkin Party Chit Chats.


I finished off my layout with my title which was made from Tangerine Abigail and Teensy Type Alpha Stickers.  I love mixing fonts!  Have you created a project using the Pumpkin Party Collection or Cut Files?  Be sure to tag Doodlebug Design on Social Media so that we can see your creations!  That's it for me today, thanks for stopping by to peek!


Tuesday, October 9, 2018

Lori Whitlock | October Creative Team Blog Hop


 Hi Everyone!   It's time for the October Creative Team Blog Hop over at Lori Whitlock!  You should have arrived here from Traci's Blog.  Here's the order for today's hop!

Lori has a number of fun new Halloween files in the shop!  I made the adorable Halloween Treat Boxes:  Pumpkin (SVG, Silhouette) and Mummy (SVG, Silhouette).  They are getting sent as part of a care package to my daughter this year!


The papers are the new Dot-Stripe Petite Prints and the mouse and spider are from Doodlebug's Pumpkin Party collection.

There's a sale happening in the Lori Whitlock SVG Shop!  Use code OCT2018 to get 30% off all SVGs and Commercial Licenses!


Also, how about a free file!!  This file is free for today only!  No code or minimum required.


Finally, how would you like to win a $20 Coupon to Lori's SVG Shop!


a Rafflecopter giveaway

That's it for me today, your next stop on the hop is Anita!  Have a great day!


Monday, October 1, 2018

Doodlebug Design | Pumpkin Party Cards

Doodlebug Halloween Collections are ALWAYS my favorites, and Pumpkin Party does not disappoint!  The candy, the trick or treaters, the kitty, even the spiders are cute!! (this coming from a girl who would burn her whole house down just to make sure a spider is dead...)  It took a little time, but I was finally able to narrow down my choices to make a few cards... take a peek!


I just love all of the Odds & Ends, they make it so easy to make a little scene on a card!  For my first card I created an inside shadow box card.  There's a front to the card, but when you open it, there's a little dimensional scene.  Here is the front of the card.  I used one of the Odds & Ends, stickers from the This and That Sheet and one of the ADORABLE little spiders from the Silly Spiders Shaped Sprinkles.  The papers are from the Pumpkin Party 6x6 pad and a sheet of Orchard Dot-Stripe Petite Prints.


And when you open the card, you get a fun little scene using more of the Odds & Ends, a Chit Chat greeting and sprinkles!  


My next card is a shutter card.  I used the base of a card from Lori Whitlock (here) and combined it with some Odds & Ends and Chit Chat pieces to make a fun scene...


I just adore the kitty trick or treater!!! And that little mouse, cuteness overload!  The background of the card is made up of the Pumpkin Party Double Sided Cardstock and Limeade Dot-Stripe Petite Prints.  The fun stars are from the Halloween Night Sprinkles.

My last card is another shadow box type card.  I knew I just had to make a card featuring those spiders!


The base of the card was made using Beetle Black Dot-Stripe Petite Prints.  I added the spider web using the plaid side of the Jack and Friends Cardstock.  The spider is from the Odds & Ends and the eek and Happy Halloween are from the Chit Chats.  My favorite thing about this card is that I added some of the spooky Eye See You Shaped Sprinkles inside the card!  

  That's it for me today, be sure to stop by the Doodlebug Design Blog over the next couple of weeks for more Pumpkin Party inspiration!  Thanks for stopping by to peek!