Showing posts with label Stamping. Show all posts

Monday, December 26, 2022

Doodlebug Design | Candy Cane Lane Happy 2023 Pop Up Card

I hope everyone had a wonderful holiday!  We are still in the swing of things with another family party today!  Before the craziness set in I got to play with the Candy Cane Lane Collection.  I knew my project would post after Christmas so I wanted to do a New Year's themed project.  I came up with this fun little snowman pop up card.  Take a peek...
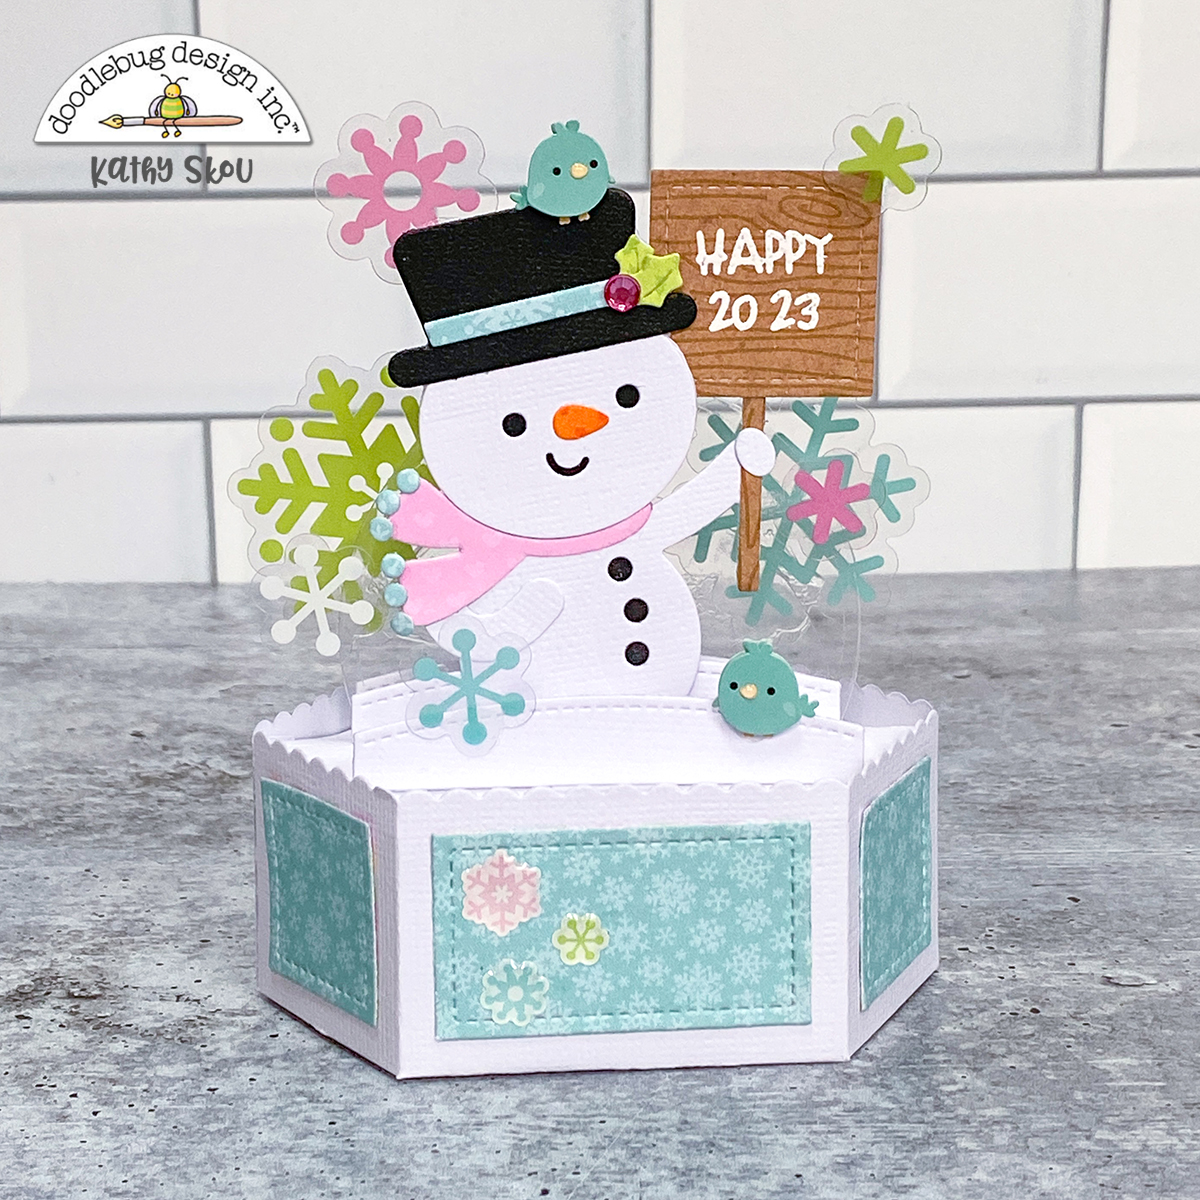

For my snowman, I used the Snow Sweet Doodle Cuts.  I cut off the Christmas tree top of the die cut, and added a little square sign in it's place.  The trunk of the tree worked perfectly as a sign post!


I added some transparency half circles to my card inserts so that I could add a whole "flurry" of the acetate snowflakes from the Bits & Pieces pack.  I love how they look like they're floating.  To attach them I used some clear glaze.  I also added the two birdies from the Love You Deerly Doodle Pop.


The happy on my sign is from the Happy Birthday Doodle Stamp set.  For the year, I used the date stamps from the Handwritten Calendar Doodle Stamps.  I stamped them in white, and added some white embossing powder so they would stand out a bit more.


I finished the base with a few snowflakes from the Frosted Flurry shaped sprinkles.  

I hope that everyone has a Happy and Healthy New Year!  I will be back in 2023 with more Doodlebug goodness! Thanks for stopping by to peek!


DOODLEBUG PRODUCTS USED

Candy Cane Lane Collection
Snow Cute Doodle Cuts
Happy Birthday Doodle Stamps
Handwritten Calendar Doodle Stamps

OTHER

Lawn Fawn Pop Up Platform Card Dies
Liquid Glaze
 Lawn Fawn Stitched Square Die
White Pigment Ink
White embossing powder
Acetate

Monday, June 27, 2022

Doodlebug Design | My Happy Place Stamped Pop Up Cards

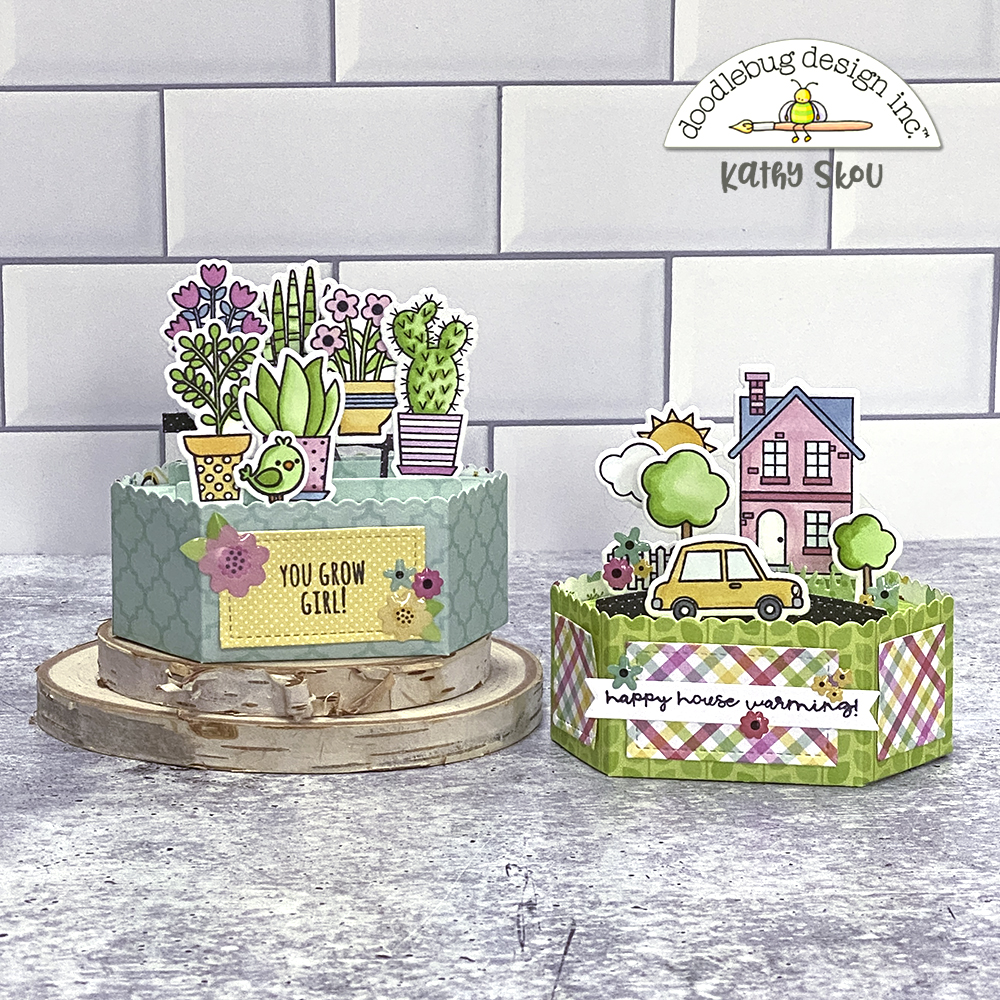
Have you seen the stamp sets that are part of the My Happy Place Collection?  There are 2 new ones... Happy Home and Garden Girl.  They are full of super cute images!  As soon as I saw them I knew I had to make a couple of fun pop up cards.  Take a peek...


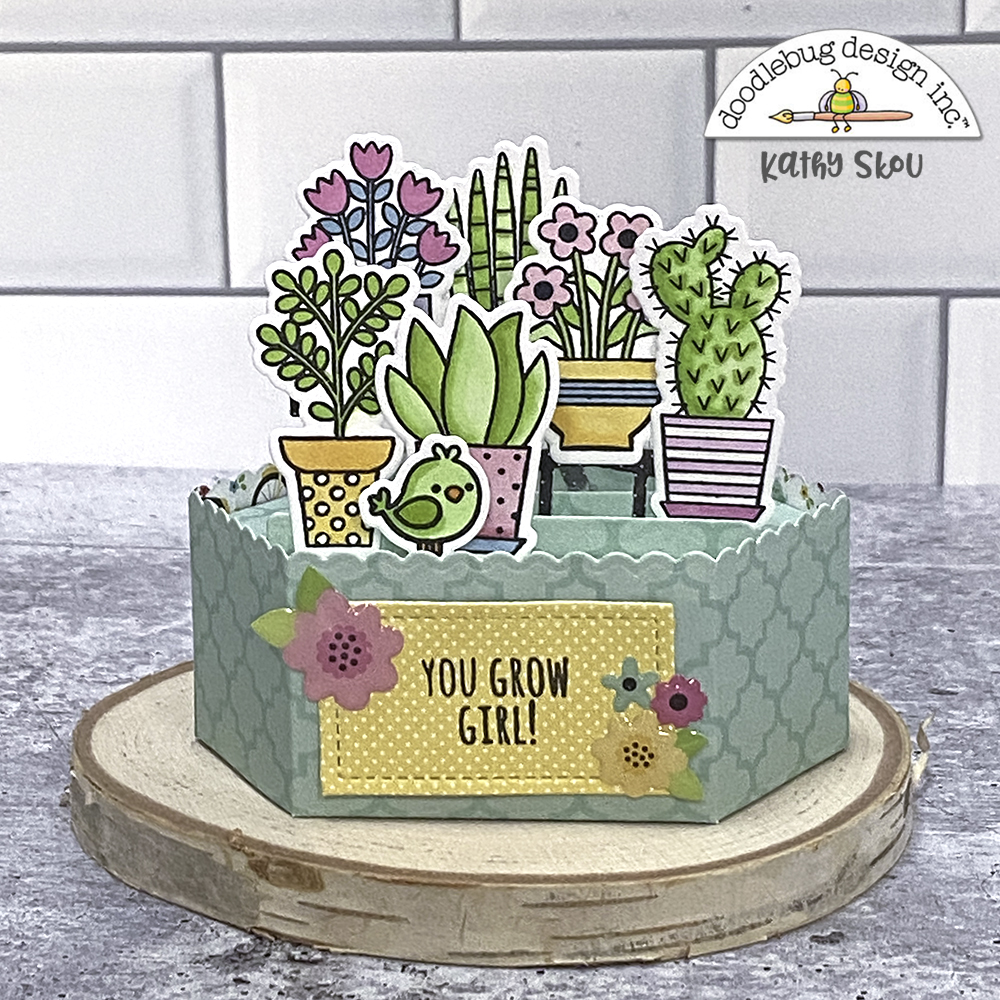
I started with the Garden Girl Doodle Stamps.  I love all of the fun plants!  They make me think of my dad's green house!  I made the base of my card with the blue side of the Enjoy the Ride paper.  I stacked my plants on some cute little benches, and then added the birdie.  I love the "you grow girl" sentiment!  I added a few of the In the Garden shaped sprinkles to complete the look.


For my next card, I used the Happy Home Doodle Stamps and Doodle Cuts.  I have friends moving into a new house, and thought this would be a fun card to help celebrate their new "happy" place.  I made a little scene with one of the houses, some trees, the fence and that adorable little car.  I added more of the In the Garden shaped shaped sprinkles .


I just love that little car!!!  Have you made any projects using the new stamps?  Make sure to tag Doodlebug Design on Facebook and Instagram.  We always love to see your creations!  That's it for me today, thanks for stopping by to peek!

DOODLEBUG PRODUCTS USED

My Happy Place Collection
My Happy Place Coordinating Petite Prints

OTHER

Lawn Fawn Platform Pop Up Dies
Lawn Fawn Banner Die
Copic Markers
Acetate


Monday, March 21, 2022

Doodlebug Design | Hippity Hoppity/Hoppy Easter Box Cards

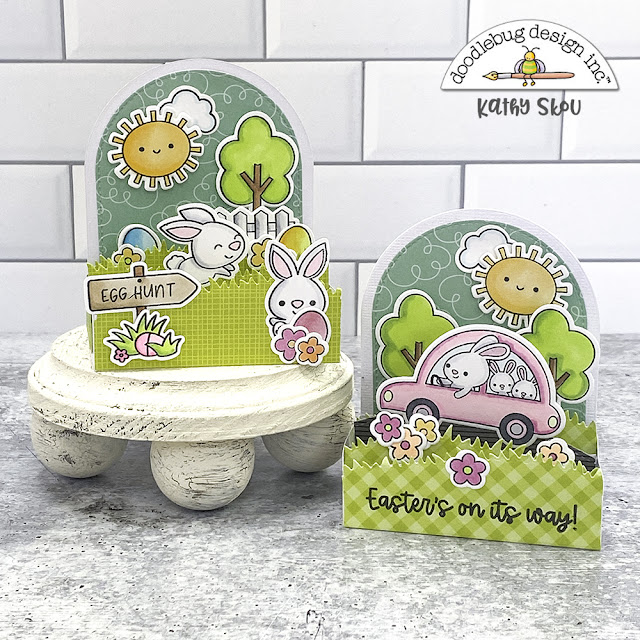
Easter will be here before we know it!  I got a head start on some fun Easter Cards using both the Hoppy Easter and Hippity Hoppity Doodle Stamps and Doodle Cuts.  These sets go so well together, it's easy to create fun little scenes.  Take a peek...


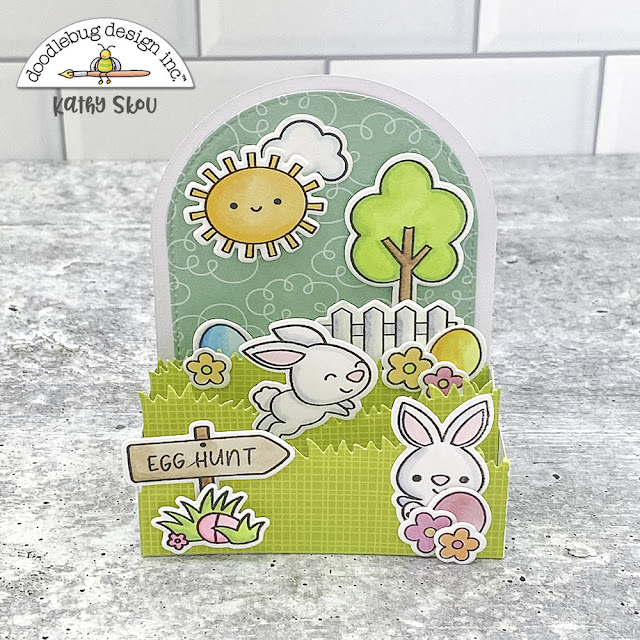
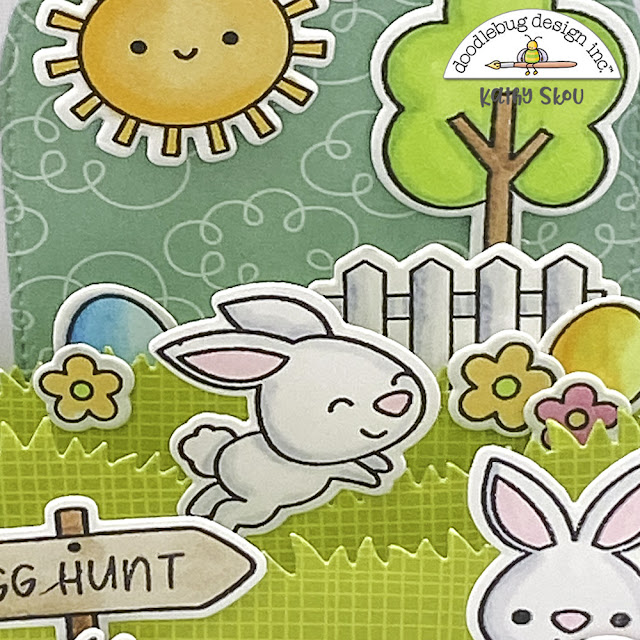
For my first card, I mixed the cute little bunnies and Egg Hunt sign from the Hoppy Easter Doodle Stamps with the trees and fence from the Hippity Hoppity Doodle Stamps.  The cloud paper is from the Spring Things Collection, and is called April Showers.  This is one of my all time favorite paper!  I think I may have bought about 20 sheets worth!!!  The grass was made from citrus Gingham Linen Petite Prints.


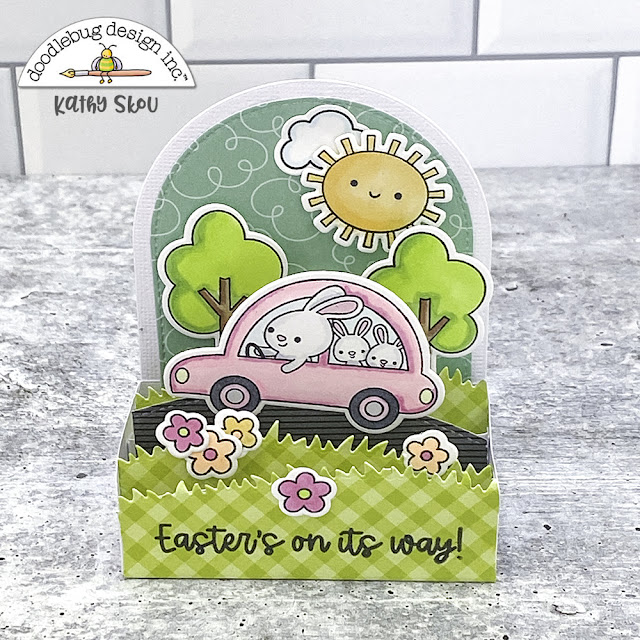
I just love those little bunnies peeking out from the grass!  For my next card I got to use my all time favorite Doodlebug stamp.... the adorable little bunnies in the punch buggy car from the Hippity Hoppity Stamps.  I set up a scene where they were driving through the trees.  


The little bunnies peeking out the back window... they are just too cute!!  And I think that a pink punch buggy would be awesome!  

Have you made any cards with the Hoppy Easter or Hippity Hoppity Doodle Stamps?  Be sure to tag Doodlebug Design on Facebook and Instagram, we always love to see what you create!  That's it for me today, thanks for stopping by to peek!


DOODLEBUG PRODUCTS USED
Hippity Hoppity Doodle Stamps/Doodle Cuts
Hoppy Easter Doodle Stamps/Doodle Cuts
Spring Things - April Showers Cardstock
Gingham Linen Petite Prints

OTHER
Copic Markers
MFT Outside the Box Dies
White Cardstock


Wednesday, January 12, 2022

Doodlebug Design | Let it Snow-Arctic Friends Box Cards

Winter is here in the Northeast!  I have a couple of friends celebrating birthdays this month, so I thought I'd use the Let it Snow Collection along with the Arctic Friends Doodle Stamps to make some fun box cards!


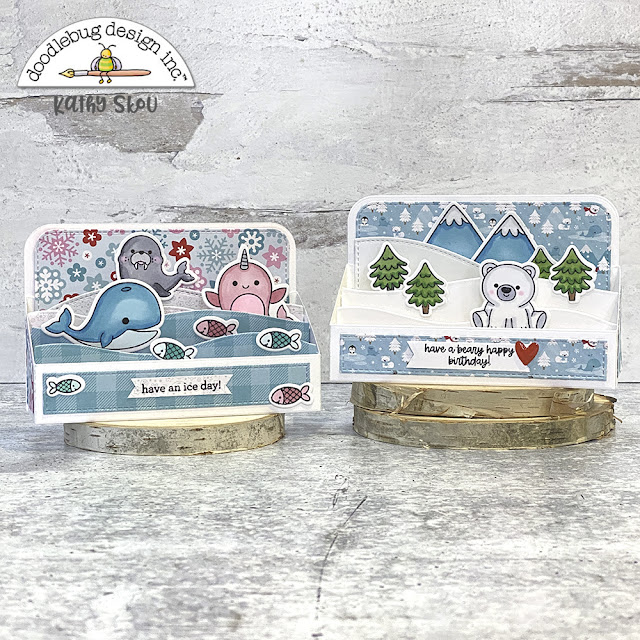
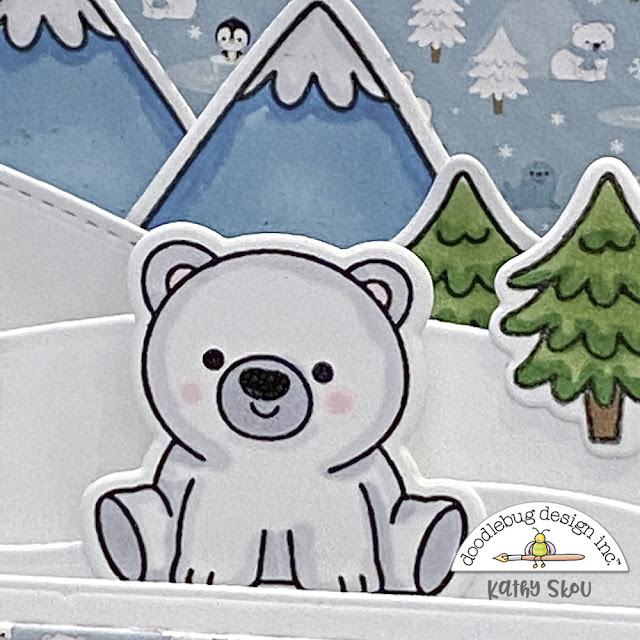
I love making dimensional scenes in my box cards.  For my first card, I created the card base using dies from my stash (MFT).  I then added adorable little polar bear from the Arctic Friends Doodle Stamps, a few trees from the Winter Wonderland Doodle Stamps and the mountains from the Great Outdoors Set.  The sentiment is from the Arctic Friends set, and is perfect for my friend's birthday!


For my next card, I stamped and colored the cute little sea creatures in the Arctic Friends Set.  They are all so cute, but I do think that little Narwhal is my favorite!  I added them to some snow mounds and waves along with the fishies!


These stamps are just perfect for winter cardmaking, and I love that the Let it Snow Collection can be used for more than just the holidays!  Have you made any projects using the Let it Snow Collection, or the new Arctic Friends Stamps?  Be sure to tag Doodlebug Design on Facebook and Instagram, we always love to see what you create!  That's it for me today, thanks for stopping by to peek!


DOODLEBUG PRODUCTS USED
Let it Snow Collection
Arctic Friends Doodle Stamps & Doodle Cuts
Winter Wonderland Doodle Stamps & Doodle Cuts
Great Outdoors Doodle Stamps & Doodle Cuts

OTHER PRODUCTS

Mini Slimline Outside the Box Level Up Die (MFT)
Copic Markers
Sizzix Big Shot


Monday, November 29, 2021

Doodlebug Design | Great Outdoors Pop Dot Cards Tutorial

I have always loved creating projects with lots of dimension... whether it be a 3d project, layout or card! I also love making little "scenes" with all of the adorable Doodlebug icons.  I decided to combine all of my loves using the Great Outdoors Collection along with the Great Outdoors Doodle Stamps to create some fun pop dot cards!  Take a peek...


I started with the adorable bear and fishy from the Great Outdoors Doodle Stamps.  I find coloring so relaxing!!!!  I layered on some of the pine trees and a night sky using papers from the 6x6 pad for my grass, sky and water.  To finish, I added the Happy Bear-thday sentiment from the Chit Chat pieces.


When you look closely, you can see all of the dimension in the card.


Next I made a sweet little card using the Moose and bunny stamps.  I added some mountains in the background, along with more of the pine trees.


And here is a close up of the card's layers...


Would you like to make some pop dot cards of your own?  I have a quick tutorial showing how I pieced them together.  To start, I created some cut files for the base of the cards.  You can get them on my blog here.  If you don't have a cutter, you can still make them.  The dimensions of the base pieces are as follows...

White Cardstock - (cut 3) 4.25" x 5.5" rectangle - with a 3.25" circle cut from the center.
White Cardstock - Card Base 8.5" x 5.5" - Fold in half
Patterned Cardstock - 4" x 5.25 rectangle - with a 3.5" circle cut from the center


On the left are the white pieces that make up the card base.  For each layer I cut some of the Great Outdoors 6x6 papers to create waves and grassy hills.  I also added a piece of the stars paper to the card base.  It will show through the holes in the layers.  I added my stamped pieces to each layer.  On the right you can see how I attached the patterned papers to the backs.  A good way to see where you want to add all of your images is to stack the layers before you assemble your card so you can see how everything lines up.


Next you want to start adding your layers to create your scene.  I started with the back-most piece with the trees and grass.  I added pop dots (you can use foam tape, or nothing if you prefer)  I centered this piece on my main card base and attached.


I then added the 2nd layer directly on top of the first, making sure everything was lined up.  There are pop dots between these layers.  To end, I added the 3rd layer, also with pop dots.  To finish I added the chit chat sentiment to the card front.

This cards can be mailed, but you will need a slightly larger envelope to mail if you've added pop dots.  If you have a cut file for an A2 Envelope I would size it up slightly to accommodate the layers, or you could use a 5x7 envelope.

The best part is that you can use any of your Doodlebug Doodle Stamps or even the Icon and Mini Icon Stickers to create fun little scenes with these bases!  If you do use the files along with your Doodlebug collections, be sure to tag us on Facebook & Instagram.  We love to see your creations.  That's it for me today, thank you for stopping by to peek!

DOODLEBUG PRODUCTS USED
Great Outdoors Collection
Great Outdoors Doodle Stamps and Doodle Cuts

OTHER
Pop Dot Card Base Cut File
Silhouette
Copic Markers
Pop Dots (or foam tape)


Monday, November 15, 2021

Doodlebug Design | Great Outdoors Thanksgiving Place Cards

Hi Everyone!  I'm so excited that we can actually do "in person" Thanksgiving this year!  It's one of my favorite holidays... family, friends... the carbs... it's all so fun!  In addition to the turkey and all the fixings... I love to add a little something to each place setting.  This year I made these fun little Truffle Box Place Cards.  I got the idea from a gift box in a card I saw on Pinterest.  I thought it would be fun to downsize it a bit to make it a place card using the Great Outdoors Collection.  Take a peek...


The place cards are made up of an easel base with a cut out that perfectly fits a little box with a cover.  The boxes are sized for a small treat.  I love all of the fall colors of the papers in the collection,  it's hard to pick a favorite... maybe the Bits of Nature, but then I adore the plaid side of the Wildflowers cardstock too!


To create my name pieces, I printed everyone's name on some white cardstock.  I then cut out the ovals using the Mini-tags Doodle Cuts.  


Decorating the place cards was my favorite part.  I stamped lots of leaves and acorns from the It's Fall Y'All Doodle Stamp Set.  I colored them with my Copics and fussy-cut them.  If you're not into fussy cutting, there are matching Doodle Cut dies for the set, but I find the cutting very relaxing!


I popped up the leaves and acorns on the covers with a little foam tape and then added one last leaf to the front of the place card.  I finished them off with some mini jewels on the leaf.  I can't wait to see them on my table!

Would you like to create your own truffle box place cards?  I created a cut file for them and it is currently available in the Lori Whitlock SVG Shop, and it will be coming soon to the Silhouette Store.  I've linked below to the SVG.  If you make some, be sure to tag @doodlebugdesign on Facebook and Instagram.  We always love to see what you create!  That's it for me today, thanks for stopping by to peek!

DOODLEBUG PRODUCTS USED

Great Outdoors Collection
It's Fall Y'All Doodle Stamps
Mini Tags Doodle Cuts
Mini Jewels Party Assortment

OTHER
Copic Markers
Sizzix Big Shot


Monday, April 19, 2021

Doodlebug Design | Bugs & Kisses Cards

I love to color.  Ever since I was little, coloring was a favorite activity.  A fresh new box of crayons... with all the fun colors (and built in sharpener!), not much could make me happier!  These days I've switched to Copics, but the joy is still the same.  The new Bugs & Kisses Stamps also make me very happy... the ladybugs, frogs, bees.... absolutely adorable! I spent a whole afternoon coloring these sweet little images.   Mixed with some papers from the Fairy Garden 6x6 pad and you have a recipe for some fun cards.  Take a peek...


For my sentiments, I used the Alex Alphabet Doodle Cuts.  I love the long, skinny look of these letters!  They are perfect for cards!  Here are some close-ups...


I always envision these cute little buggies hanging around a meadow of wildflowers, so I added some of the floral stamps from the Fairy Garden Doodle Stamp set.  My favorites are the tall holly-hocks!


And the little mushrooms are so fun.  I added some dots to the top of some of them using a white jelly roll pen.


And of course I needed at least one "punny" card!  That little bumblebee... could he BEE any cuter?  

Have you created any cards or projects with the new Fairy Garden and Bugs & Kisses Doodle Stamps?  Be sure to tag Doodlebug Design on Facebook and Instagram... we love to see your creations.  That's it for me today, thanks for stopping by to peek!


DOODLEBUG PRODUCTS USED
Fairy Garden Collection
Fairy Garden Doodle Stamps / Doodle Cuts
Bugs & Kisses Doodle Stamps / Doodle Cuts
Alex Alphabet Doodle Cuts
Petite Prints

OTHER
Rectangle Stitched Dies
Rectangle Scalloped Frame Die
Grass Border Die
Copic Markers
Sizzix Big Shot

Monday, April 5, 2021

Doodlebug Design | Fairy Garden Box Cards

I am so excited to be kicking off a few weeks of Fairy Garden inspiration on the Doodlebug Design Blog!  As soon as I saw this collection, I fell in love with all of the adorable little icons... the fairies, the mushrooms... and all of those cute little bugs!!  I've always said... only Doodlebug can make a cute bug!  Along with some of the papers in the collection, I decided to use the new Fairy Garden and Bugs & Kisses Doodle Stamps to make some fun box cards. Take a peek...


As I mentioned... I just love the little bugs in the Bugs & Kisses Doodle Stamps!  I decided to make a card featuring them in a meadow.  The flower and mushroom stamps made it easy to create a sweet little scene!  I used some Gingham Linen Petite Prints for the grass and the clouds side of the Glow Bugs Paper for my background.  I will be stocking up on this paper... it's perfect for creating scenes and making backgrounds!


Here's a close up of those cute little critters!


Just as the bugs love hanging in the meadow, I though those adorable little Fairies from the Fairy Garden Doodle Stamps would love hanging out in the clouds!  I created this fun card featuring them floating about.  The sun stamp is from the Hippity Hoppity Doodle Stamps.


How cute are those fairies??!!  I already have more cards planned using both of these Doodle Stamp Sets... they are absolutely adorable!  Have you created any projects using the Fairy Garden Collection and Doodle Stamps? Be sure to tag Doodlebug Design on Facebook and Instagram, we love to see your projects!  Also, be sure to stop by the blog over the next couple of weeks for more Fairy Garden inspiration.  That's it for me today, thanks for stopping by to peek!

DOODLEBUG PRODUCTS USED
Fairy Garden Collection
Fairy Garden Doodle Stamps/Doodle Cuts
Bugs & Kisses Doodle Stamps/Doodle Cuts
Hippity Hoppity Doodle Stamps/Cuts

OTHER
Copic Markers
Sizzix Big Shot
MFT Outside the Box Level Up Dies
Tumbled Glass Distress Ink
White Cardstock

Monday, August 24, 2020

Doodlebug Design | Special Delivery Baby Stats Frame

One of my favorite gifts I received when my daughter was born was a sweet frame with all of her birth stats.  It made such a cute decoration in her room.  Now when there's a special new little in our life, I love to make a baby stats frame for the new parents.  As soon as I saw the Special Delivery Collection, I knew I was going to use it to make one for a new little guy!  Check it out...


I started with the gray & white checked side of the Choo-Choo paper for my background. I printed the baby's name & stats along the bottom of the paper.  I then cut some train cars that I designed to look like the choo-choo train odds & ends from some of the other papers in the collection.  The cut files for these weren't available when I created this, but they are now in the Lori Whitlock SVG Shop here.  I filled the cars with some of the adorable little critters from the Odds & Ends.  Here are some close ups.


I added some sprinkles to the wheels for a little dimension.  And of course I can't give a gift without a cute little card!  I used the new Toy Box Stamps and dies to make this card.  The sentiment was stamped on a piece I cut using the Doodle Cuts Mini Tags and attached with a couple of mini brads.


Now all I need to do is get this all in the mail to the new parents!  Have you made any projects using Special Delivery?  Be sure to tag Doodlebug Design on Facebook and Instagram.  We love to see your creations!  That's it for me today, thanks for stopping by to peek!

Doodlebug Products Used
Special Delivery Collection
Toy Box Stamps & Dies
All Occasion Mini Tags Dies
Pastel Mini Brads

Other
Printer
Silhouette
Sizzix
Copic Markers
Stitched Rectangle & Circle Dies
Frame

Tuesday, June 16, 2020

Cape Cod Resilience Fund Fundraiser with Jenn Shurkus

Hi Everyone, Today I'm showcasing a couple of projects using some fun stamps from my friend Jenn Shurkus!   Jenn  lives on Cape Cod and is raising money for the Cape Cod Resilience Fund. This fund will help small businesses on Cape Cod who are experiencing financial difficulties due to Covid-19. This fund will be around for the long run, and continue to help small businesses out in the future. 

YOU can help by purchasing one of Jenn's exclusive Cape Cod Stamp Set. For each set sold between June 15th- July 1st, $10 will be donated to the CCRF. Another way you can help? Share this with your creative friends and help spread the word! More details can be found on Jenn's Site .

Jenn's stamps are so cute, and are perfect for summer cards and projects!  I decided to make a couple of 3D projects with them... take a peek....


My first project is this cute little Cape Cod Cottage Treat Box.  I used Lawn Fawn's Scalloped Treat Box Die as the base.  I added some "weathered wood" siding using the Scalloped Treat Box Dog House Add-on and the windows and doors are from the Winter house add-on.  To complete my Cape Cottage look, I added the lobster trap and Adirondack Chair from Jenn's Stamp set.  This cute little box is the prefect size for some salt-water taffy or a couple of truffles from the Chatham Candy Manor! (my FAVORITE Candy shop on the Cape! )


We do a lot of boating around the Cape.  Last year we were lucky to get a boat slip in Provincetown for Carnival.  It's a WILD time!  We took this picture with friends on MacMillan Wharf..  It's one of my all time favorite pictures!  Jenn's stamps were the perfect addition to my shadowbox frame!


The Cape is near and dear to me.  Not only do we spend a lot of time there now, but I've been going every summer since I was a child, and worked summers there in high school (hello to the Breakfast Room!).  I even met my husband there way back in 1982!  It's a very seasonal area that relies on tourism for a huge part of their revenue, and with the pandemic, a lot of businesses will suffer.  If you love stamping, and the beach, please consider purchasing one of Jenn's Stamp sets, every little bit helps!  That's it for me today, thanks for stopping by to peek!


Monday, April 20, 2020

Doodlebug Design | Party Animal Doodle Stamps Gift Set

Have you seen the new Hey Cupcake Party Animal - Girl Doodle Stamps??  Seriously they are everything a girl could ask for....kitties, hedgehogs, llamas...  I'm in love.  As soon as my box arrived, I pulled them out and set to work!  I put together this sweet little birthday set... take a peek...


I thought it would be cute to put together a fun "social distancing" birthday card.  The kitty, hedgehog and balloon are from the Party Animal Girl stamp set, and the flowers are from the new Birthday Girl Stamp set. (I added some glitter sprinkles to some of the centers) I love how the happy birthday sentiment was the perfect size to fit in the balloon!  I used the new Borders and Edges Dies to make the curtain and the line for the grass below.


I also decorated a little gift bag as well to go along with my card.  Of course I had to pick another kitty stamp!  I love the balloon kitty on the Hey Cupcake Birthday Bash paper so I copied the look using the stamps.  The clouds are from the Rainbows and Unicorns Stamp set.


Aren't the stamp images just the cutest?  Would you like to make your own gift set?  I created SVG files for the Window Card and the Cute Bag and they are available exclusively in the Lori Whitlock SVG Shop.  If you create something with them, be sure to tag Doodlebug Design on Facebook or Instagram, we love to see your projects!  That's it for me today, thanks for stopping by to peek!


DOODLEBUG DESIGN PRODUCTS USED:
Hey Cupcake Collection
Birthday Girl Doodle Stamps & Dies
Party Animals -Girl Doodle Stamps & Dies
Rainbows & Unicorns Stamps & Dies
Window Card SVG
Cute Bag SVG

OTHER:
Silhouette Cameo
Copic Markers